Building an Online Game With LoopBack 4 - Front-end with React (Part 6)

Originally published on strongloop.com
Part 6: Front-end with React
In This Episode
Now our project is on IBM Cloud. But you may notice there is not anything that we can actually play with. It's just some APIs. How can we call it a game without front-end UI?
In this episode, I will build signup, login, and home pages with React.
You can check here for the code from this episode.
Introduction
In this series, I’m going to help you learn LoopBack 4 and how to use it to easily build your own API and web project. We’ll create a new project I’ve been thinking about: an online web text-based adventure game. In this game, you can create your own account to build characters, fight monsters and find treasures. You will be able to control your character to take a variety of actions: attacking enemies, casting spells, and getting loot. This game also allows multiple players to log in and play with their friends.
Previously on Building an Online Game With LoopBack 4
In the last episode, we covered how to run our project in Docker and push it to Kubernetes cluster on IBM Cloud.
Here are the previous episodes:
- Part 1: Building a Simple LoopBack Project With MongoDB
- Part 2: Generating Universally Unique ID and Managing Models Relationships
- Part 3: Customizing APIs in Controller
- Part 4: User Authentication and Role-Based Access Control
- Part 5: Deploying our Application to Kubernetes on IBM Cloud
Prerequisites
I am completely new to the front-end world. So I took some online courses. If you don't have any front-end experience like me, you should spend some time on the basic knowledge before moving on.
You don't need to finish them all. Watching online courses is boring. You can start to write code whenever you think you are ready.
I will also use some other libraries.
You don't have to fully understand them before. I will show you how to use them step by step.
Initializing React Project
Install create-react-app
npm i create-react-app
Then run this to create a new react project:
create-react-app <your_project_name>
If you go to the project you just created and run npm start, you will see a page like this:
structure Designing
Before we start, we need to spend some time on the project structure.
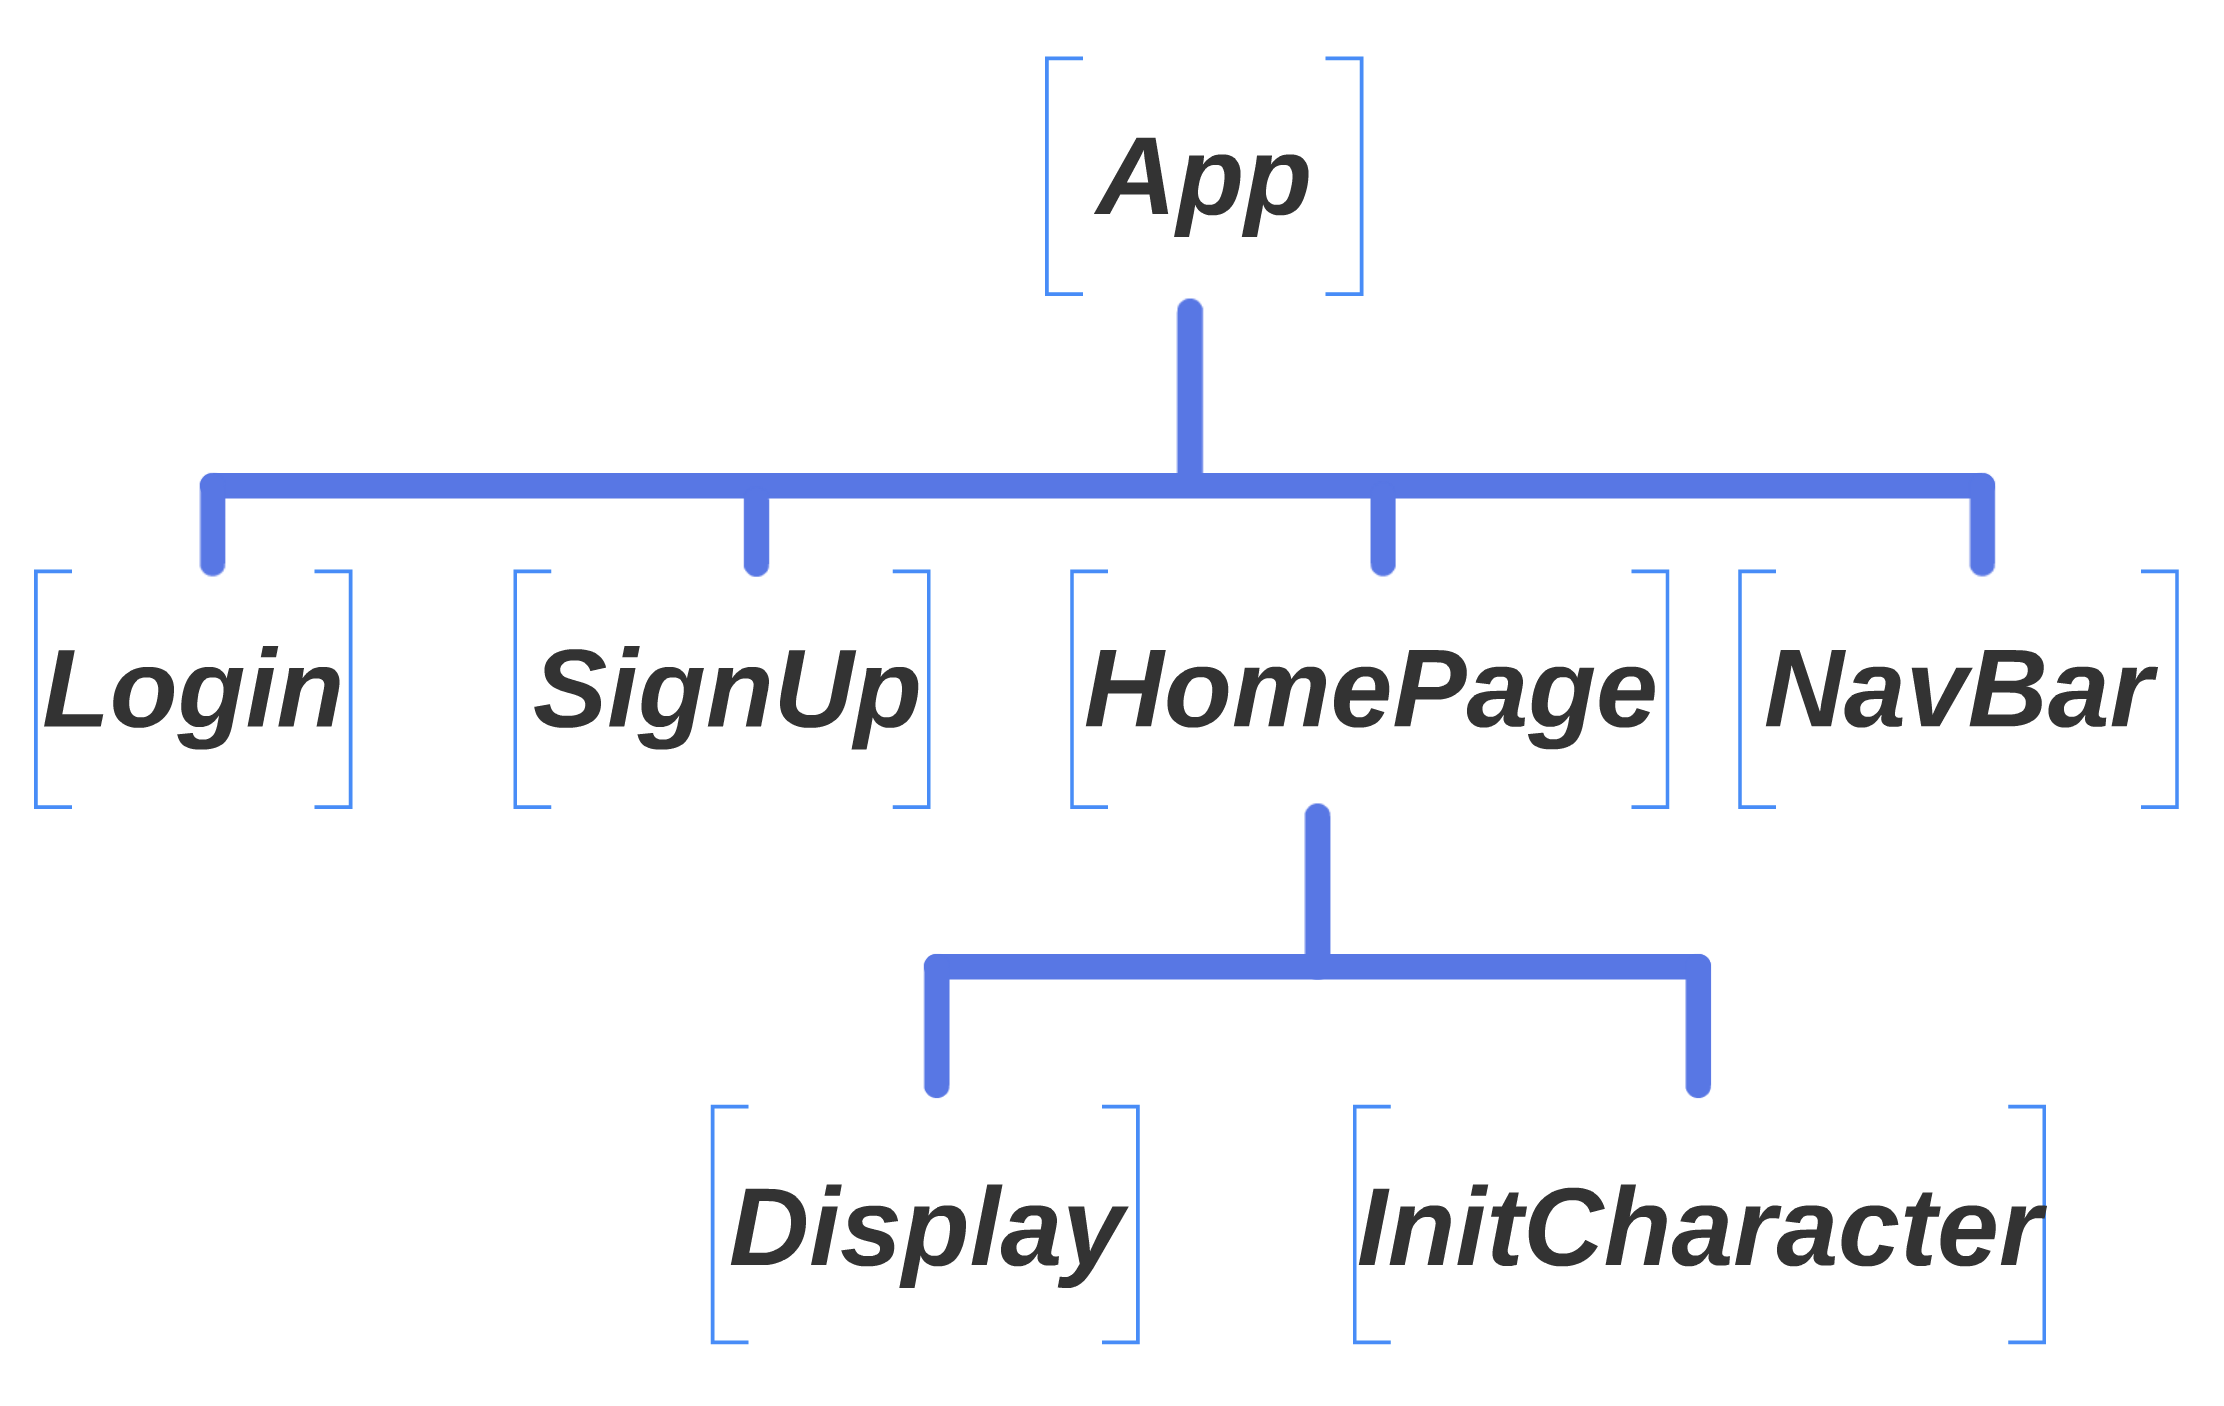
In a React project, everything is component. Your pages, navigation bar, input form, or even a button, all of them could be components. All of those components are organized in a tree structure. Here is my project structure.
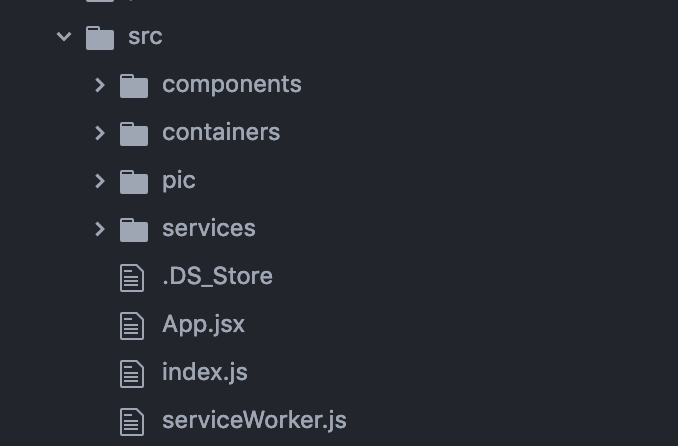
And here is my directory structure:
App.jsx
First, open the src/App.js file. It will be the parent of all other components.
Change your App.js to App.jsx. It makes our life easier to use .jsx in React.
Then change your App.jsx to this:
import React, { Component } from "react";
import { BrowserRouter as Router, Redirect, Route } from "react-router-dom";
import { NavBar } from "./components";
import { Login, Signup, HomePage } from "./containers";
import { userService, authenticationService } from "./services";
import "./containers/style.css";

class App extends Component {
  constructor(props) {
    super(props);
    this.state = {
      currentUser: "",
      data: {},
      gear: {}
    };
    this.handelLogout = this.handelLogout.bind(this);
    this.handelUserData = this.handelUserData.bind(this);
  }
  componentDidMount() {
    this.handelUserData();
  }

  handelLogout() {
    authenticationService.logout();
    this.setState({ currentUser: "", data: {}, gear: {} });
  }

  handelUserData() {
    const currentUser = localStorage.getItem("currentUser");
    if (currentUser) {
      this.setState({ currentUser });
      userService.getUserData(currentUser, this);
      userService.getGearData(currentUser, this);
    }
  }

  render() {
    const { gear, data, currentUser } = this.state;
    return (
      <div className="jumbotron">
        <NavBar data={data} onLogout={this.handelLogout} />
        <div className="container basic">
          <div className="col-sm-8 col-sm-offset-2 basic">
            <Router>
              <div>
                <Route
                  exact
                  path="/"
                  render={props =>
                    localStorage.getItem("currentUser") ? (
                      <HomePage
                        {...props}
                        currentUser={currentUser}
                        data={data}
                        gear={gear}
                        handelUserData={this.handelUserData}
                      />
                    ) : (
                      <Redirect
                      to={
                        {
                          pathname: "/login",
                          state: { from: props.location }
                        }
                      }
                      />
                    )
                  }
                />
                <Route
                  path="/login"
                  render={props => (
                    <Login {...props} handelUserData={this.handelUserData} />
                  )}
                />
                <Route path="/signup" component={Signup} />
              </div>
            </Router>
          </div>
        </div>
        <div className="text-center">
          <p>
            <a href="https://loopback.io/">Powered by Loopback 4</a>
          </p>
          <p>
            <a href="https://github.com/gobackhuoxing/first-web-game-lb4">
              Github@gobackhuoxing
            </a>
          </p>
        </div>
      </div>
    );
  }
}

export { App };
Here we will use a library called react-router-dom. Simply run npm install react-router-dom to install it. This library allows us to navigate between different components.
Let's go through this line by line.
The first thing you can see is:
this.state = {
  currentUser: "",
  data: {},
  gear: {}
};
This is the state of this component. Because we are using JWT in back-end for login. we need to store the token for future API calls. We also need to store the basic user information, so we can display it somewhere.
Then we have three functions:
  componentDidMount() {
    this.handelUserData();
  }

  handelLogout() {
    authenticationService.logout();
    this.setState({ currentUser: "", data: {}, gear: {} });
  }

  handelUserData() {
    const currentUser = localStorage.getItem("currentUser");
    if (currentUser) {
      this.setState({ currentUser });
      userService.getUserData(currentUser, this);
      userService.getGearData(currentUser, this);
    }
  }
handelLogoutis a function to logout. It will remove our token fromlocalStorageand user data fromstate.handelUserDatais a function to fetch user data from back-end and store the data instate. In react, never changestatedirectly. If you do that, React will not update the page, because it doesn't know what has been changed. You should always usesetState()to changestateso that React can update all pages that related to this change.authenticationServiceanduserServiceare my self-defined services to do all of the API calls.componentDidMountis a react build-in function that will be executed after the first render. I use it to get user data before page loading. You can check here for more information about the React component life cycle.
The render function defined how does our component look like. I have four children components here: NavBar, HomePage, Login, and Signup.
We use react-router-dom for redirecting. I have three pages in my route:
- Login("/login")
- Signup("/signup")
- HomePage("/")
<Route
  exact
  path="/"
  render={props =>
    localStorage.getItem("currentUser") ? (
      <HomePage
        {...props}
        currentUser={currentUser}
        data={data}
        gear={gear}
        handelUserData={this.handelUserData}
      />
    ) : (
      <Redirect
      to={
        {
          pathname: "/login",
          state: { from: props.location }
        }
      }
      />
    )
  }
/>
If we can find token in localStorage, we will go to HomePage, otherwise, we will go to Login.
You can check here for my code of App.jsx.
Containers
A container is also a component. It is also a holder for other components. We have three containers: HomePage, Login, Signup.
Let's first create a containers folder in /src.
Login and Signup
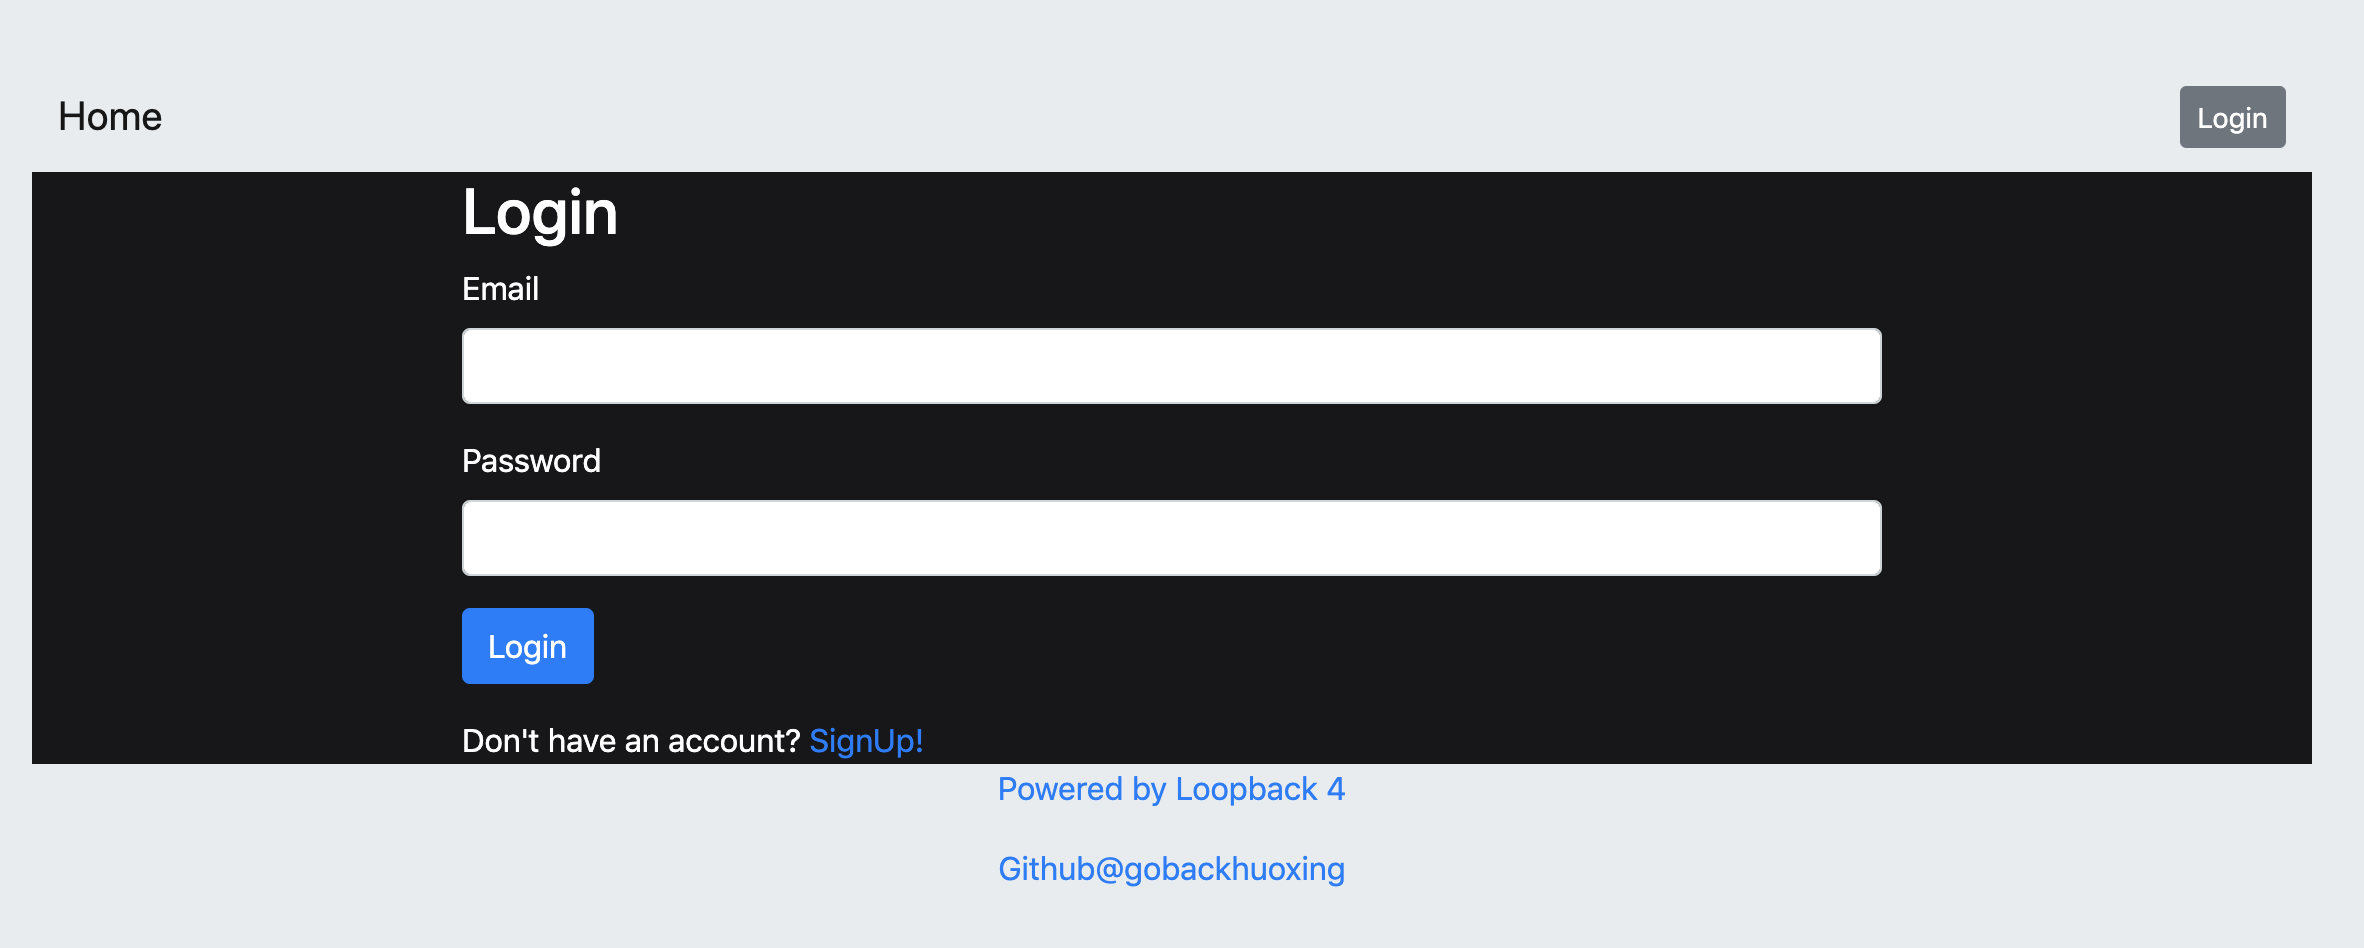
This is my Login.jsx.
import React, { Component } from "react";
import { authenticationService } from "../services";

class Login extends Component {
  unmount = false;
  constructor(props) {
    super(props);

    this.state = {
      email: "",
      password: "",
      error: "",
      submitted: false,
      loading: false,
      shortPassword: false
    };

    this.handleChange = this.handleChange.bind(this);
    this.handleSubmit = this.handleSubmit.bind(this);
  }

  componentWillUnmount() {
    this.unmount = true;
  }

  handleChange(e) {
    const { name, value } = e.target;
    this.setState({ [name]: value });
  }

  handleSubmit = e => {
    e.preventDefault();
    const { email, password } = this.state;
    const { handelUserData } = this.props;

    this.setState({ submitted: true });
    if (!(email && password)) {
      return;
    }
    if (password.length < 8) {
      this.setState({ shortPassword: true });
      return;
    }

    this.setState({ loading: true, shortPassword: false });
    authenticationService.login(email, password, this).then(
      function() {
        if (!this.unmount) this.setState({ loading: false });
      }.bind(this)
    );
    handelUserData();
  };

  render() {
    const {
      email,
      password,
      error,
      loading,
      submitted,
      shortPassword
    } = this.state;
    return (
      <React.Fragment>
        <h2>Login</h2>
        {error && error.response.data.error.statusCode === 404 && (
          <div className={"alert alert-danger"}>Email doesn't exist</div>
        )}
        {error && error.response.data.error.statusCode === 401 && (
          <div className={"alert alert-danger"}>Password is incorrect</div>
        )}
        {error && error.response.data.error.statusCode === 422 && (
          <div className={"alert alert-danger"}>
            Email or Password is invalid
          </div>
        )}
        <form name="form" onSubmit={this.handleSubmit}>
          <div className="form-group">
            <label htmlFor="email">Email</label>
            <input
              type="email"
              className="form-control"
              name="email"
              value={email}
              onChange={this.handleChange}
            />
          </div>
          {submitted && !email && (
            <div className="alert alert-danger">Email is required</div>
          )}
          <div className="form-group">
            <label htmlFor="password">Password</label>
            <input
              type="password"
              className="form-control"
              name="password"
              value={password}
              onChange={this.handleChange}
            />
          </div>
          {submitted && !password && (
            <div className="alert alert-danger">Password is required</div>
          )}
          {submitted && shortPassword && (
            <div className="alert alert-danger">
              Password too short - minimum length is 8 characters
            </div>
          )}
          <div className="form-group">
            <button className="btn btn-primary" disabled={loading}>
              Login
            </button>
          </div>
          <div>
            Don't have an account? <a href="/signup"> SignUp!</a>
          </div>
        </form>
      </React.Fragment>
    );
  }
}
export { Login };
I have an input form to collect data from users and pass that data to back-end. After the user hit the Login button, this handleSubmit function will be called.
handleSubmit = e => {
  e.preventDefault();
  const { email, password } = this.state;
  const { handelUserData } = this.props;

  this.setState({ submitted: true });
  if (!(email && password)) {
    return;
  }
  if (password.length < 8) {
    this.setState({ shortPassword: true });
    return;
  }

  this.setState({ loading: true, shortPassword: false });
  authenticationService.login(email, password, this).then(
    function() {
      if (!this.unmount) this.setState({ loading: false });
    }.bind(this)
  );
  handelUserData();
};
It basically validates all the user input and action. If everything looks good, it will pass the user's email and password to back-end, otherwise, it will tell the user there is something wrong.
It also uses authenticationService for login API call. We will talk about that later. The Signup page is almost the same. You can check my repo for more details.
HomePage
After login, the user will be navigated to HomePage.
import React, { Component } from "react";
import { Display, InitCharacter } from "../components";
import "./style.css";

class HomePage extends Component {
  componentDidMount() {
    const { handelUserData, data } = this.props;
    if (!data) this.props.history.push("/login");
    handelUserData();
  }

  render() {
    const { data, gear, currentUser, handelUserData } = this.props;

    return (
      <React.Fragment>
        <div className="basic">
          {data.name !== "nousername" && (
            <h2>
              LV.{data.level} {data.name}
            </h2>
          )}
          {data.name !== "nousername" && (
            <Display className="basic" data={data} gear={gear} />
          )}

          {data.name === "nousername" && (
            <InitCharacter
              className="basic"
              currentUser={currentUser}
              data={data}
              handelUserData={handelUserData}
            />
          )}
        </div>
      </React.Fragment>
    );
  }
}

export { HomePage };
We have two children components in HomePage:
InitCharacterto create a new character if this is the user's first time login.Displayto display the user's character information, if the user already has one.
{
  data.name !== "nousername" && (
    <Display className="basic" data={data} gear={gear} />
  );
}

{
  data.name === "nousername" && (
    <InitCharacter
      className="basic"
      currentUser={currentUser}
      data={data}
      handelUserData={handelUserData}
    />
  );
}
We will store the user's information in the state of App. If the user doesn't have a character name, we will show Display component, otherwise, we will show InitCharacter component.
You can check here for the code of containers.
Components
Create a component folder in src. We will put all re-useable components here.
InitCharacter
import React, { Component } from "react";
import { userService, gearList } from "../services";
import "./style.css";
class InitCharacter extends Component {
unmount = false;
constructor(props) {
super(props);
this.state = {
name: "",
error: null,
submitted: false,
loading: false,
lastClick: null
};
this.handleChange = this.handleChange.bind(this);
this.handleSubmit = this.handleSubmit.bind(this);
}
componentWillUnmount() {
this.unmount = true;
}
handleChange(e) {
const { name, value } = e.target;
this.setState({ [name]: value });
}
handleSubmit = e => {
e.preventDefault();
const { name, lastClick } = this.state;
const { currentUser, handelUserData } = this.props;
this.setState({ submitted: true });
if (!name && !lastClick) {
return;
}
this.setState({ loading: true });
let gear = {};
switch (lastClick.id) {
case "1":
gear = {
weapon: gearList.weapons.guideBookJunior,
armor: gearList.armors.silkRobe,
skill: gearList.skills.sacrifice
};
break;
case "2":
gear = {
weapon: gearList.weapons.surgicalDagger,
armor: gearList.armors.labCoat,
skill: gearList.skills.bloodLetting
};
break;
case "3":
gear = {
weapon: gearList.weapons.rustyShortSword,
armor: gearList.armors.chainArmor,
skill: gearList.skills.slap
};
break;
default:
break;
}
userService.initCharacter(currentUser, name, gear, this).then(function() {
handelUserData();
});
};
handelClick = e => {
const { lastClick } = this.state;
e.target.classList.toggle("open");
if (lastClick) lastClick.classList.toggle("open");
if (!this.unmount) this.setState({ lastClick: e.target });
};
render() {
const { name, submitted, loading } = this.state;
return (
<React.Fragment>
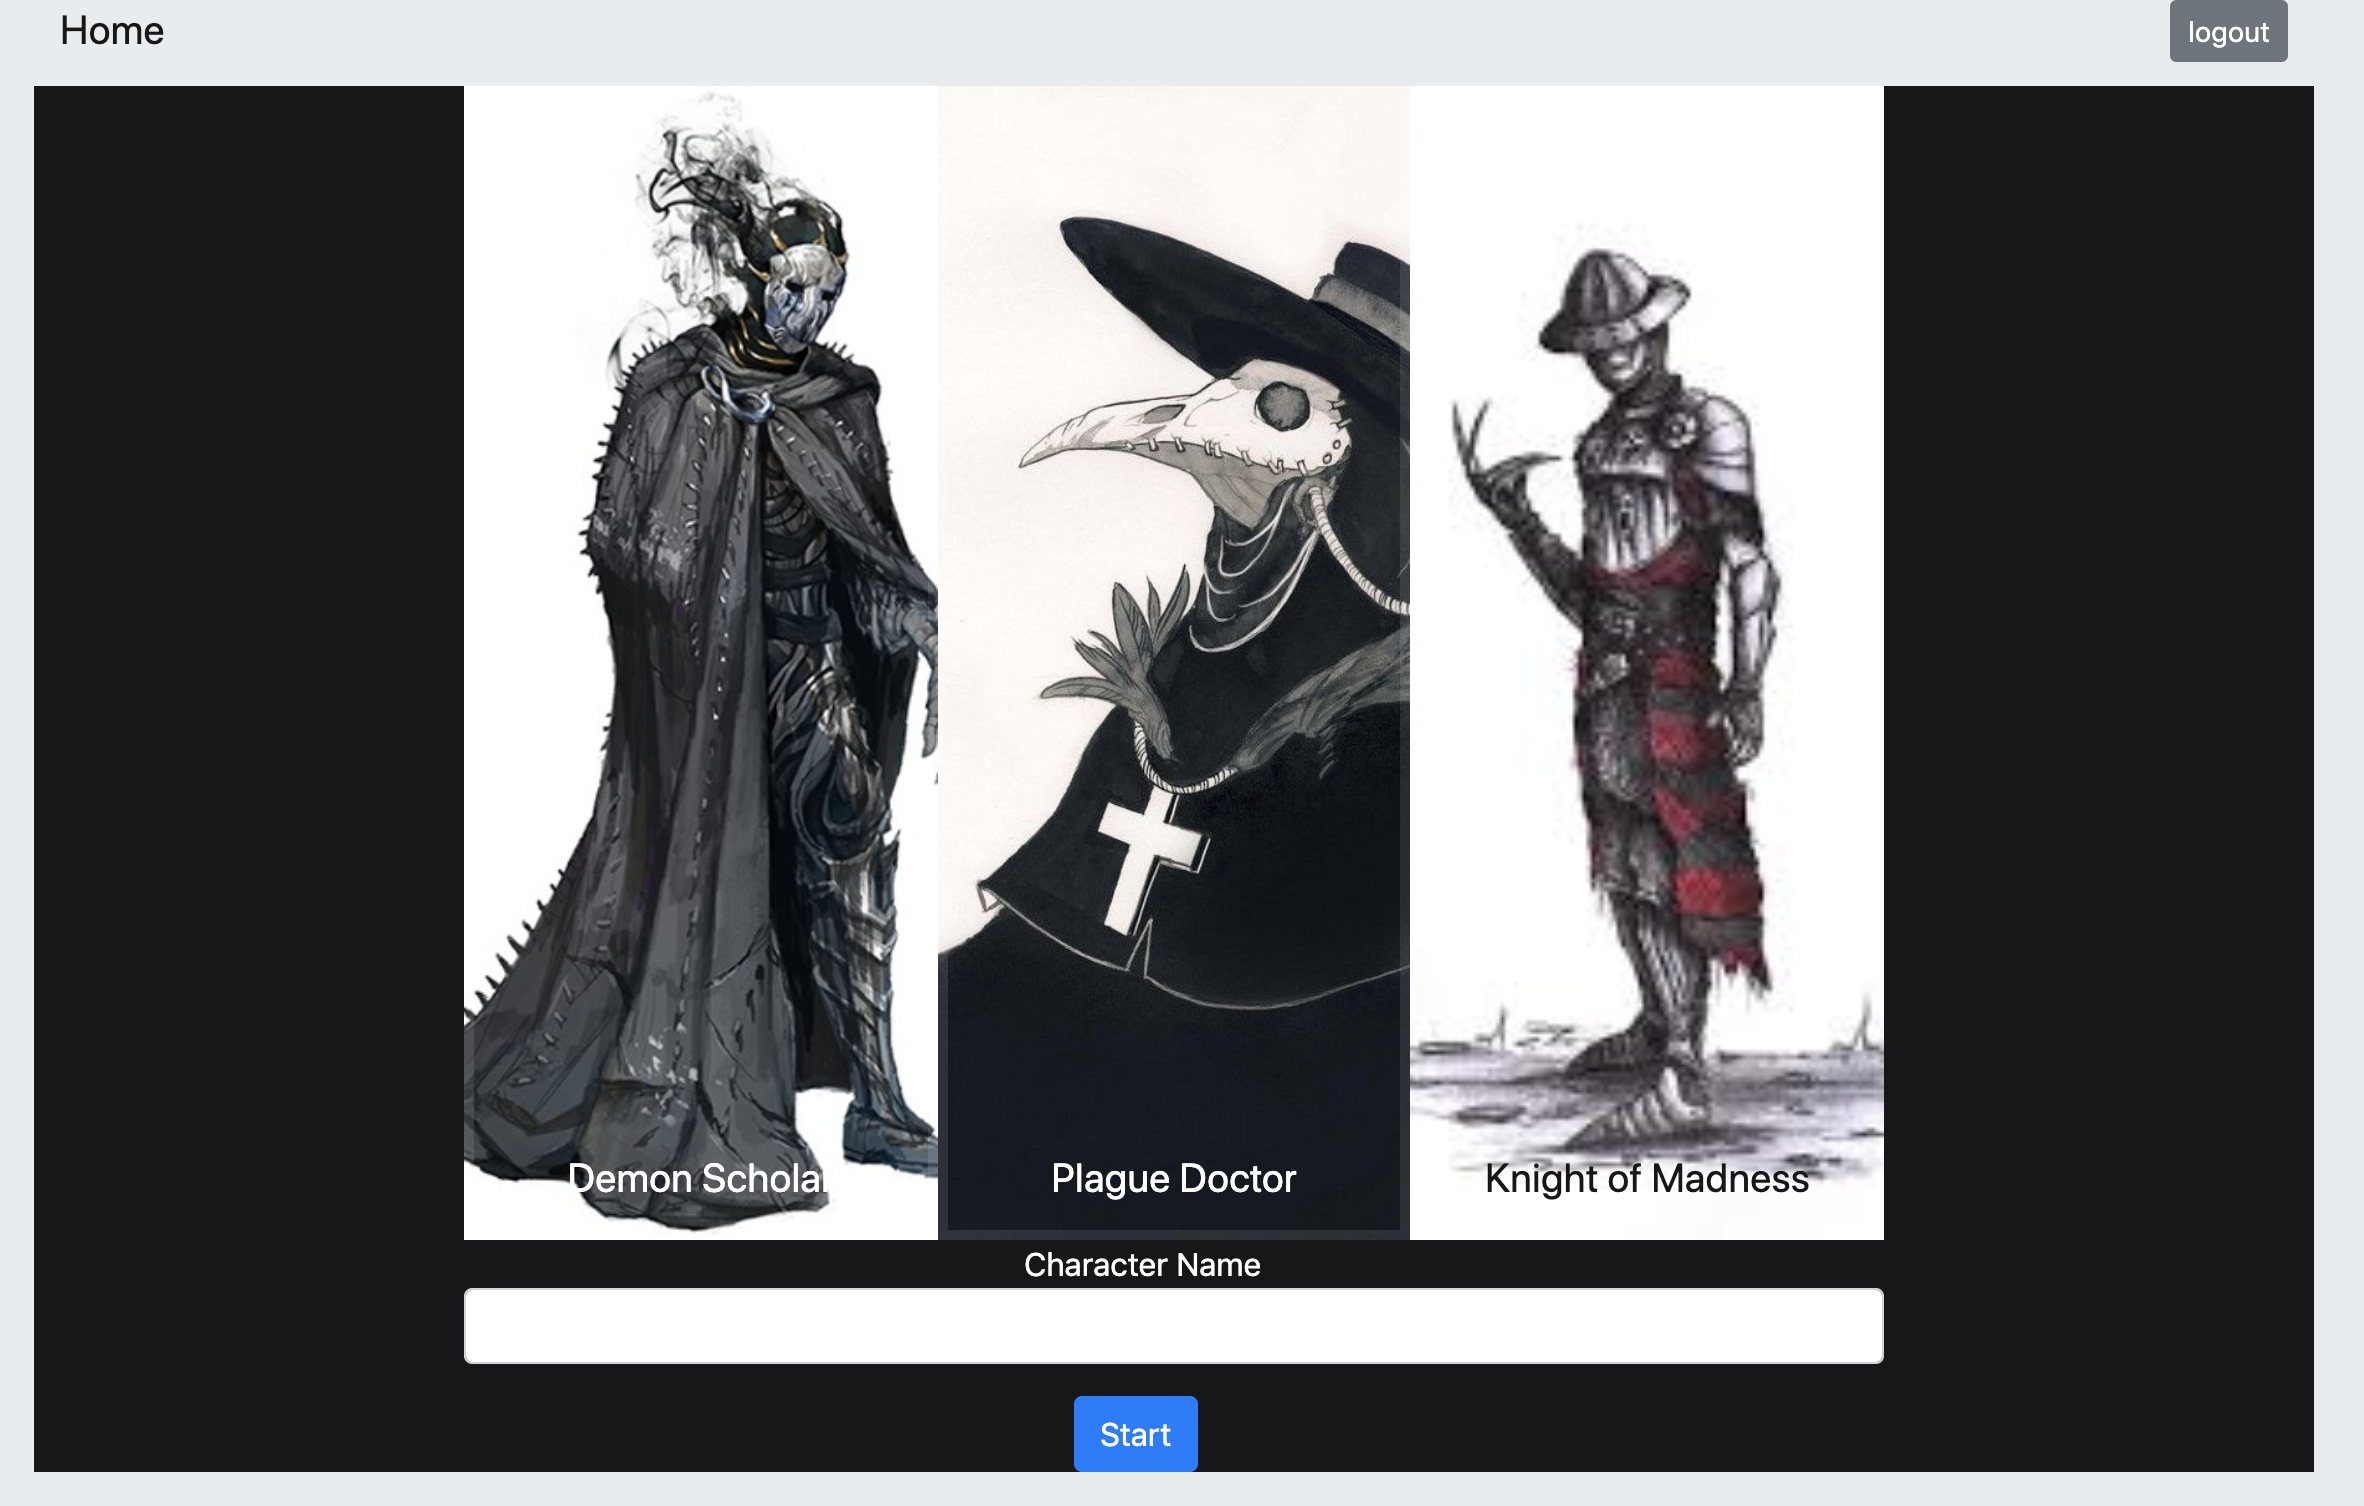
<div className="panels">
<div id="1" className="panel panel1" onClick={this.handelClick}>
<p className="classes">Demon Scholar</p>
</div>
<div id="2" className="panel panel2" onClick={this.handelClick}>
<p className="classes">Plague Doctor</p>
</div>
<div id="3" className="panel panel3" onClick={this.handelClick}>
<p className="classes knight">Knight of Madness</p>
</div>
</div>
<form name="form" onSubmit={this.handleSubmit}>
<div className="form-group">
<label className="text" htmlFor="name">
Character Name
</label>
<input
type="name"
className="form-control"
name="name"
value={name}
onChange={this.handleChange}
/>
{submitted && !name && (
<div className="alert alert-danger">
Character name is required
</div>
)}
</div>
<div className="form-group button">
<button className="btn btn-primary button" disabled={loading}>
Start
</button>
</div>
</form>
</React.Fragment>
);
}
}
export { InitCharacter };
I have three classes for a user to choose from. If the user clicks one of the classes, the handelClick function will store that one in state. Then we call userService.initCharacter to create a new character.
Display
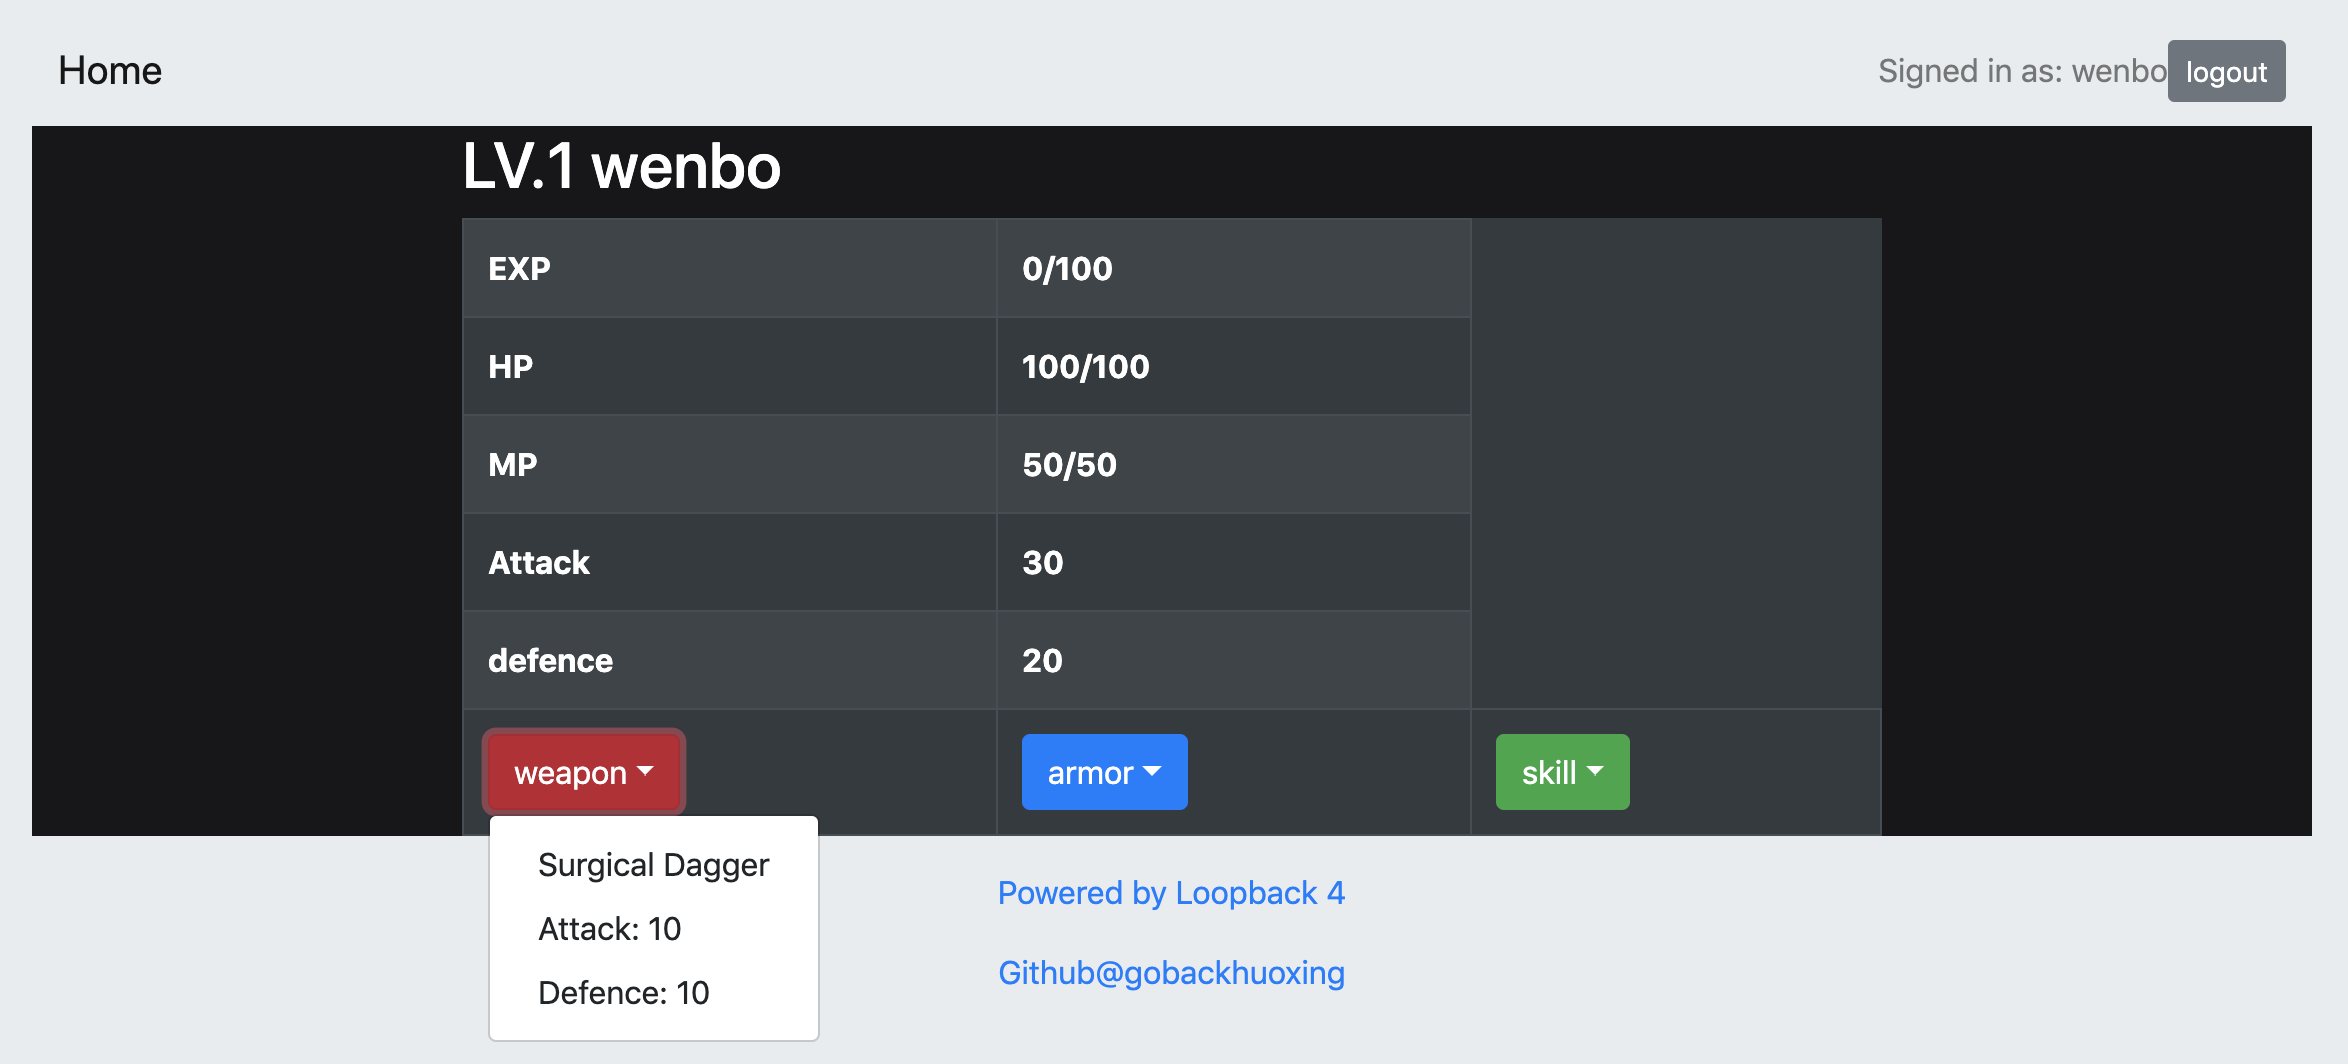
If the user has one character, we will jump to Display page to show all of the user information.
import React, { Component } from "react";
import { DropdownButton, Dropdown, Table } from "react-bootstrap";
import "./style.css";

class Display extends Component {
  render() {
    const { data, gear } = this.props;
    return (
      <React.Fragment>
        <Table striped bordered hover variant="dark">
          <tbody>
            <tr>
              <th>EXP</th>
              <th>
                {data.currentExp}/{data.nextLevelExp}
              </th>
            </tr>
            <tr>
              <th>HP</th>
              <th>
                {data.currentHealth}/{data.maxHealth}
              </th>
            </tr>
            <tr>
              <th>MP</th>
              <th>
                {data.currentMana}/{data.maxMana}
              </th>
            </tr>
            <tr>
              <th>Attack</th>
              <th>{data.attack}</th>
            </tr>
            <tr>
              <th>defence</th>
              <th>{data.defence}</th>
            </tr>

            <tr>
              <th>
                <DropdownButton
                  title="weapon"
                  variant="danger"
                  id="weapon"
                  key="weapon"
                >
                  {gear[0] === "no weapon" && (
                    <Dropdown.Item eventKey="1"> {gear[0]}</Dropdown.Item>
                  )}
                  {gear[0] && gear[0] !== "no weapon" && (
                    <Dropdown.Item eventKey="1">{gear[0].name} </Dropdown.Item>
                  )}
                  {gear[0] && gear[0] !== "no weapon" && (
                    <Dropdown.Item eventKey="1">
                      Attack: {gear[0].attack}{" "}
                    </Dropdown.Item>
                  )}
                  {gear[0] && gear[0] !== "no weapon" && (
                    <Dropdown.Item eventKey="1">
                      Defence: {gear[0].defence}{" "}
                    </Dropdown.Item>
                  )}
                </DropdownButton>
              </th>

              <th>
                <DropdownButton
                  title="armor"
                  variant="primary"
                  id="armor"
                  key="armor"
                >
                  {gear[1] === "no armor" && (
                    <Dropdown.Item eventKey="1"> {gear[1]}</Dropdown.Item>
                  )}
                  {gear[1] && gear[1] !== "no armor" && (
                    <Dropdown.Item eventKey="1">{gear[1].name} </Dropdown.Item>
                  )}
                  {gear[1] && gear[1] !== "no armor" && (
                    <Dropdown.Item eventKey="1">
                      Attack: {gear[1].attack}{" "}
                    </Dropdown.Item>
                  )}
                  {gear[1] && gear[1] !== "no armor" && (
                    <Dropdown.Item eventKey="1">
                      Defence: {gear[1].defence}{" "}
                    </Dropdown.Item>
                  )}
                </DropdownButton>
              </th>

              <th>
                <DropdownButton
                  title="skill"
                  variant="success"
                  id="skill"
                  key="skill"
                >
                  {gear[2] === "no skill" && (
                    <Dropdown.Item eventKey="2"> {gear[2]}</Dropdown.Item>
                  )}
                  {gear[2] && gear[2] !== "no skill" && (
                    <Dropdown.Item eventKey="1">{gear[2].name} </Dropdown.Item>
                  )}
                  {gear[2] && gear[2] !== "no skill" && (
                    <Dropdown.Item eventKey="1">
                      Attack: {gear[2].attack}{" "}
                    </Dropdown.Item>
                  )}
                  {gear[2] && gear[2] !== "no skill" && (
                    <Dropdown.Item eventKey="1">
                      Cost: {gear[2].cost}{" "}
                    </Dropdown.Item>
                  )}
                </DropdownButton>
              </th>
            </tr>
          </tbody>
        </Table>
      </React.Fragment>
    );
  }
}

export { Display };
In HomePage, we passed data and gear to Display like this:
<Display className="basic" data={data} gear={gear} />
Then, in Display, we receive them by using props
const { data, gear } = this.props;
Here I use a library called react-bootstrap to decorate this component. Feel free to use anything you like. That is an advantage of React. You can use almost any library you want with React.
Services
Create services folder in src. Here is where all API calls happen.
authenticationService
authenticationService is for all authentication API calls.
import { apiService } from "./APIServices";
export const authenticationService = {
  login,
  signup,
  logout
};

const axios = require("axios");

function login(email, password, self) {
  const data = {
    email: email,
    password: password
  };
  const header = {
    "Content-Type": "application/json"
  };
  return axios
    .post(apiService.login, data, header)
    .then(function(response) {
      localStorage.setItem("currentUser", response.data.token);
      self.props.history.push("/");
    })
    .catch(function(error) {
      if (!self.unmount) self.setState({ error });
    });
}

function signup(email, password, self) {
  const header = {
    "Content-Type": "application/json"
  };
  const data = {
    email: email,
    password: password,
    name: "nousername"
  };
  return axios
    .post(apiService.character, data, header)
    .then(function() {
      self.props.history.push("/login");
    })
    .catch(function(error) {
      if (!self.unmount) self.setState({ error });
    });
}

function logout() {
  console.log("logout");
  localStorage.removeItem("currentUser");
}
We are using a library called axios to do all API calls. The basic syntax is like this:
axios.get/post/put/patch(<Your_URL>,<Your_body>,<your_header>)
In the login function:
axios
  .post(apiService.login, data, header)
  .then(function(response) {
    localStorage.setItem("currentUser", response.data.token);
    self.props.history.push("/");
  })
  .catch(function(error) {
    if (!self.unmount) self.setState({ error });
  });
We store the token in localStorage. Then we jump to the HomePage. self.props.history.push("/") is how we navigate between different components by using react-router-dom.
userService
userService handles all API calls that related to users, like change name and fetch user data.
import { authenticationService } from "./AuthServices";
import { apiService } from "./APIServices";

export const userService = {
  getUserData,
  getGearData,
  changeCharacterName,
  initCharacter,
  changeWeapon,
  changeArmor,
  changeSkill
};

const axios = require("axios");

function getUserData(currentUser, self) {
  axios
    .get(apiService.character, {
      headers: { Authorization: `Bearer ${currentUser}` }
    })
    .then(function(response) {
      self.setState({ data: response.data });
    })
    .catch(function() {
      authenticationService.logout();
    });
}

function getGearData(currentUser, self) {
  axios
    .get(apiService.updatecharacter, {
      headers: { Authorization: `Bearer ${currentUser}` }
    })
    .then(function(response) {
      self.setState({ gear: response.data });
    })
    .catch(function() {
      authenticationService.logout();
    });
}

function changeCharacterName(currentUser, name, self) {
  const data = {
    name: name
  };
  axios
    .patch(apiService.changename, data, {
      headers: { Authorization: `Bearer ${currentUser}` }
    })
    .catch(function(error) {
      if (error.response && error.response.data.error.statusCode === 401)
        authenticationService.logout();
      else if (!self.unmount) self.setState({ error });
    });
}

function initCharacter(currentUser, name, gear, self) {
  const data = {
    name: name,
    gear
  };
  return axios
    .patch(apiService.initCharacter, data, {
      headers: { Authorization: `Bearer ${currentUser}` }
    })
    .catch(function(error) {
      if (error.response && error.response.data.error.statusCode === 401)
        authenticationService.logout();
      else if (!self.unmount) self.setState({ error });
    });
}

function changeWeapon(currentUser, gear, self) {
  axios
    .patch(apiService.updateweapon, gear.weapon, {
      headers: { Authorization: `Bearer ${currentUser}` }
    })
    .catch(function(error) {
      if (error.response && error.response.data.error.statusCode === 401)
        authenticationService.logout();
      else if (!self.unmount) self.setState({ error });
    });
}

function changeArmor(currentUser, gear, self) {
  axios
    .patch(apiService.updatearmor, gear.armor, {
      headers: { Authorization: `Bearer ${currentUser}` }
    })
    .catch(function(error) {
      if (error.response && error.response.data.error.statusCode === 401)
        authenticationService.logout();
      else if (!self.unmount) self.setState({ error });
    });
}

function changeSkill(currentUser, gear, self) {
  axios
    .patch(apiService.updateskill, gear.skill, {
      headers: { Authorization: `Bearer ${currentUser}` }
    })
    .catch(function(error) {
      if (error.response && error.response.data.error.statusCode === 401)
        authenticationService.logout();
      else if (!self.unmount) self.setState({ error });
    });
}
You can check here for the code of Services.
Applying This to Your Own Project
In this episode, we covered how to create simple login, signup and home pages with React. We also learned how to connect front-end and back-end. React is the most popular front-end framework today. You can easily use it to create your own front-end UI. It doesn't have to be React and LoopBack. The basic idea is similar.
What's Next?
Next time, we will extend our project on back-end APIs. So we can actually have something to play as a game.
In the meantime, learn more about LoopBack in past blogs.