Prerequisite: Install command-line tools as described in Installation.
Recommended: Read LoopBack core concepts.
Page Contents
You’re not the only one who’ll use the API you just created. That means you’ll need to document your API. Fortunately, LoopBack provides API Explorer for you.
Note: If you followed Create a simple API, keep that app running and skip down to Run API Explorer.
If you’re just jumping in, follow the steps below to catch up…
Get the app (in the state following the last article) from GitHub and install all its dependencies:
$ git clone https://github.com/strongloop/loopback-getting-started.git
$ cd loopback-getting-started
$ git checkout step1
$ npm install
Run API Explorer
Run the application:
$ node .
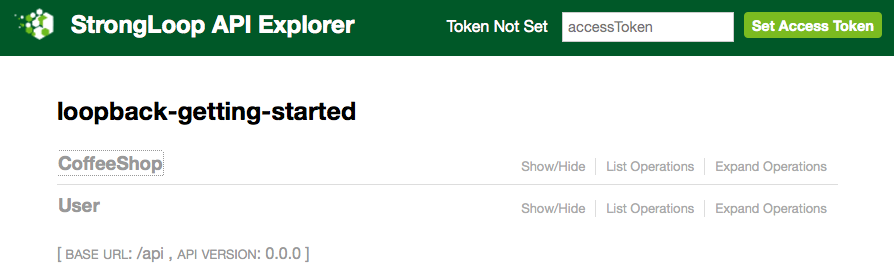
Now go to http://localhost:3000/explorer. You’ll see the StrongLoop API Explorer showing the two models this application has: Users and CoffeeShops:
 </figure>
About LoopBack built-in models
In addition to the CoffeeShop model that you defined, by default Loopback generates the User model and its endpoints for every application.
LoopBack creates several other models for common use cases. For more information, see built-in models .
Exploring the CoffeeShop model
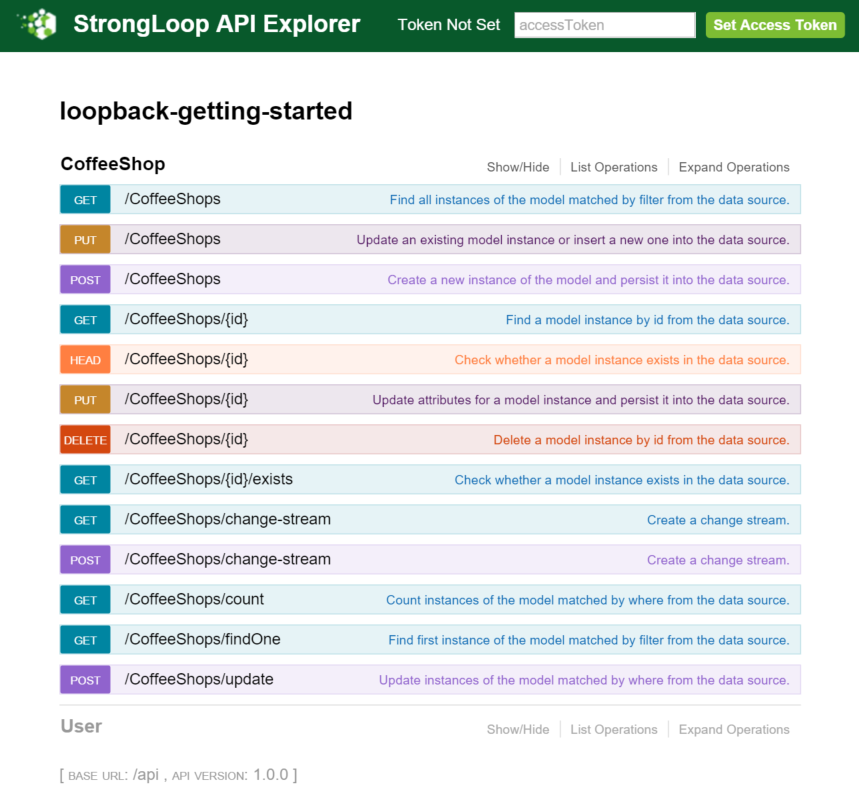
Right now, you’re going to “drill down” on the CoffeeShop model. Click on CoffeeShops to show all its API endpoints:
 </figure>
Scan down the rows of the API endpoints: you can see that they cover all the normal create, read, update, and delete (CRUD) operations, and then some.
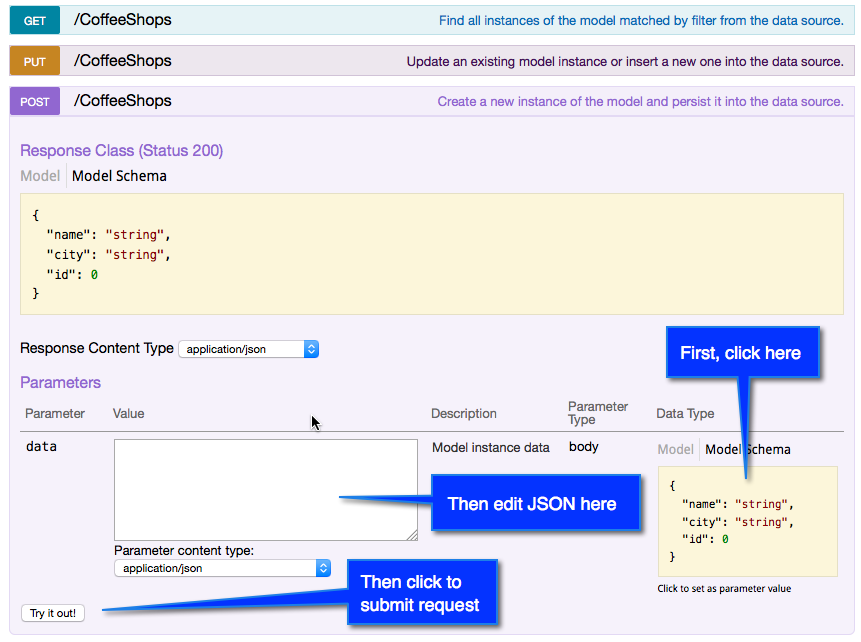
Click on POST /CoffeeShops Create a new instance of the model and persist it into the data source to expand that operation:
 </figure>
Follow the instructions in the diagram above.
Click in Model Schema to get a JSON “data template” that you can edit in the data field.
Add some text for the name property. You don’t have to put anything for the id property, because LoopBack will automatically manage it to ensure there is always a unique ID for each model instance.
{
  "name": "My Coffee Shop",
  "id": 0
}
Then click the Try it out! button.
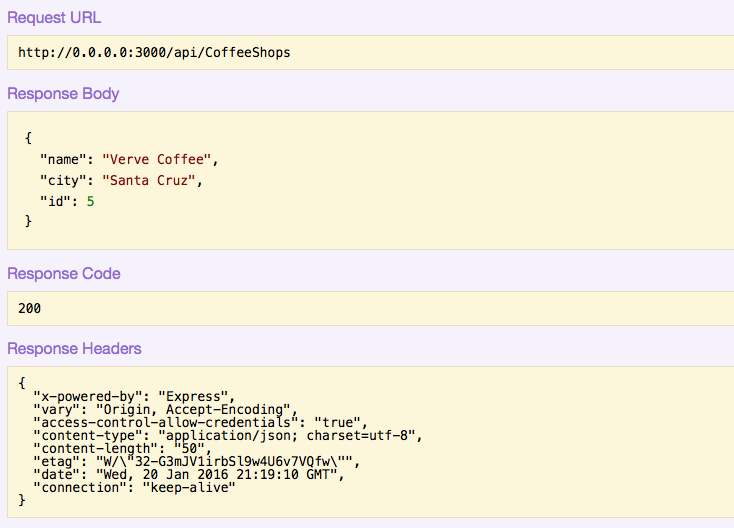
You’ll see information on the REST request submitted and the application’s response (for example):
 </figure>
The Response Body field will show the data that you just entered, returned as confirmation that it was added to the data source.
Now click on GET /CoffeeShops to expand that endpoint. Click Try it out! to retrieve the data you entered for the CoffeeShop model. You should see the record you created using the POST API.
If you are so inclined, try some other requests: You can enter more complicated queries using the filter field to specify a Where filter, Limit filter, and other kinds of filters on the query. See Querying data for more information.
Tip: API Explorer automatically adds “filter” to the query string, but you must enter Stringified JSON in the filter field. Also make sure that the quotes you use are proper straight quotes ( “ ), not curved or typographic quotation marks ( “ or ” ). These can often be hard to distinguish visually.
You may have noticed the accessToken field and Set Access Token button at the top right of the API Explorer window. Use these to authenticate a user and “login” to an app so you can perform actions that require authentication. For more information, see Introduction to User model authentication.
Next: In Connect your API to a data source, you’ll learn how to persist your data model to a database such as MongoDB.