Overview
Security is of paramount importance when developing a web or mobile application and usually consists of two distinct pieces:
- Authentication
- Authorization
Authentication is a process of verifying user/entity to the system, which enables identified/validated access to the protected routes.
Authorization is a process of deciding if a user can perform an action on a protected resource.
Note: For a description of an Authorization process, please see Authorization.
This document gives you an overview of the authentication system provided in LoopBack 4.
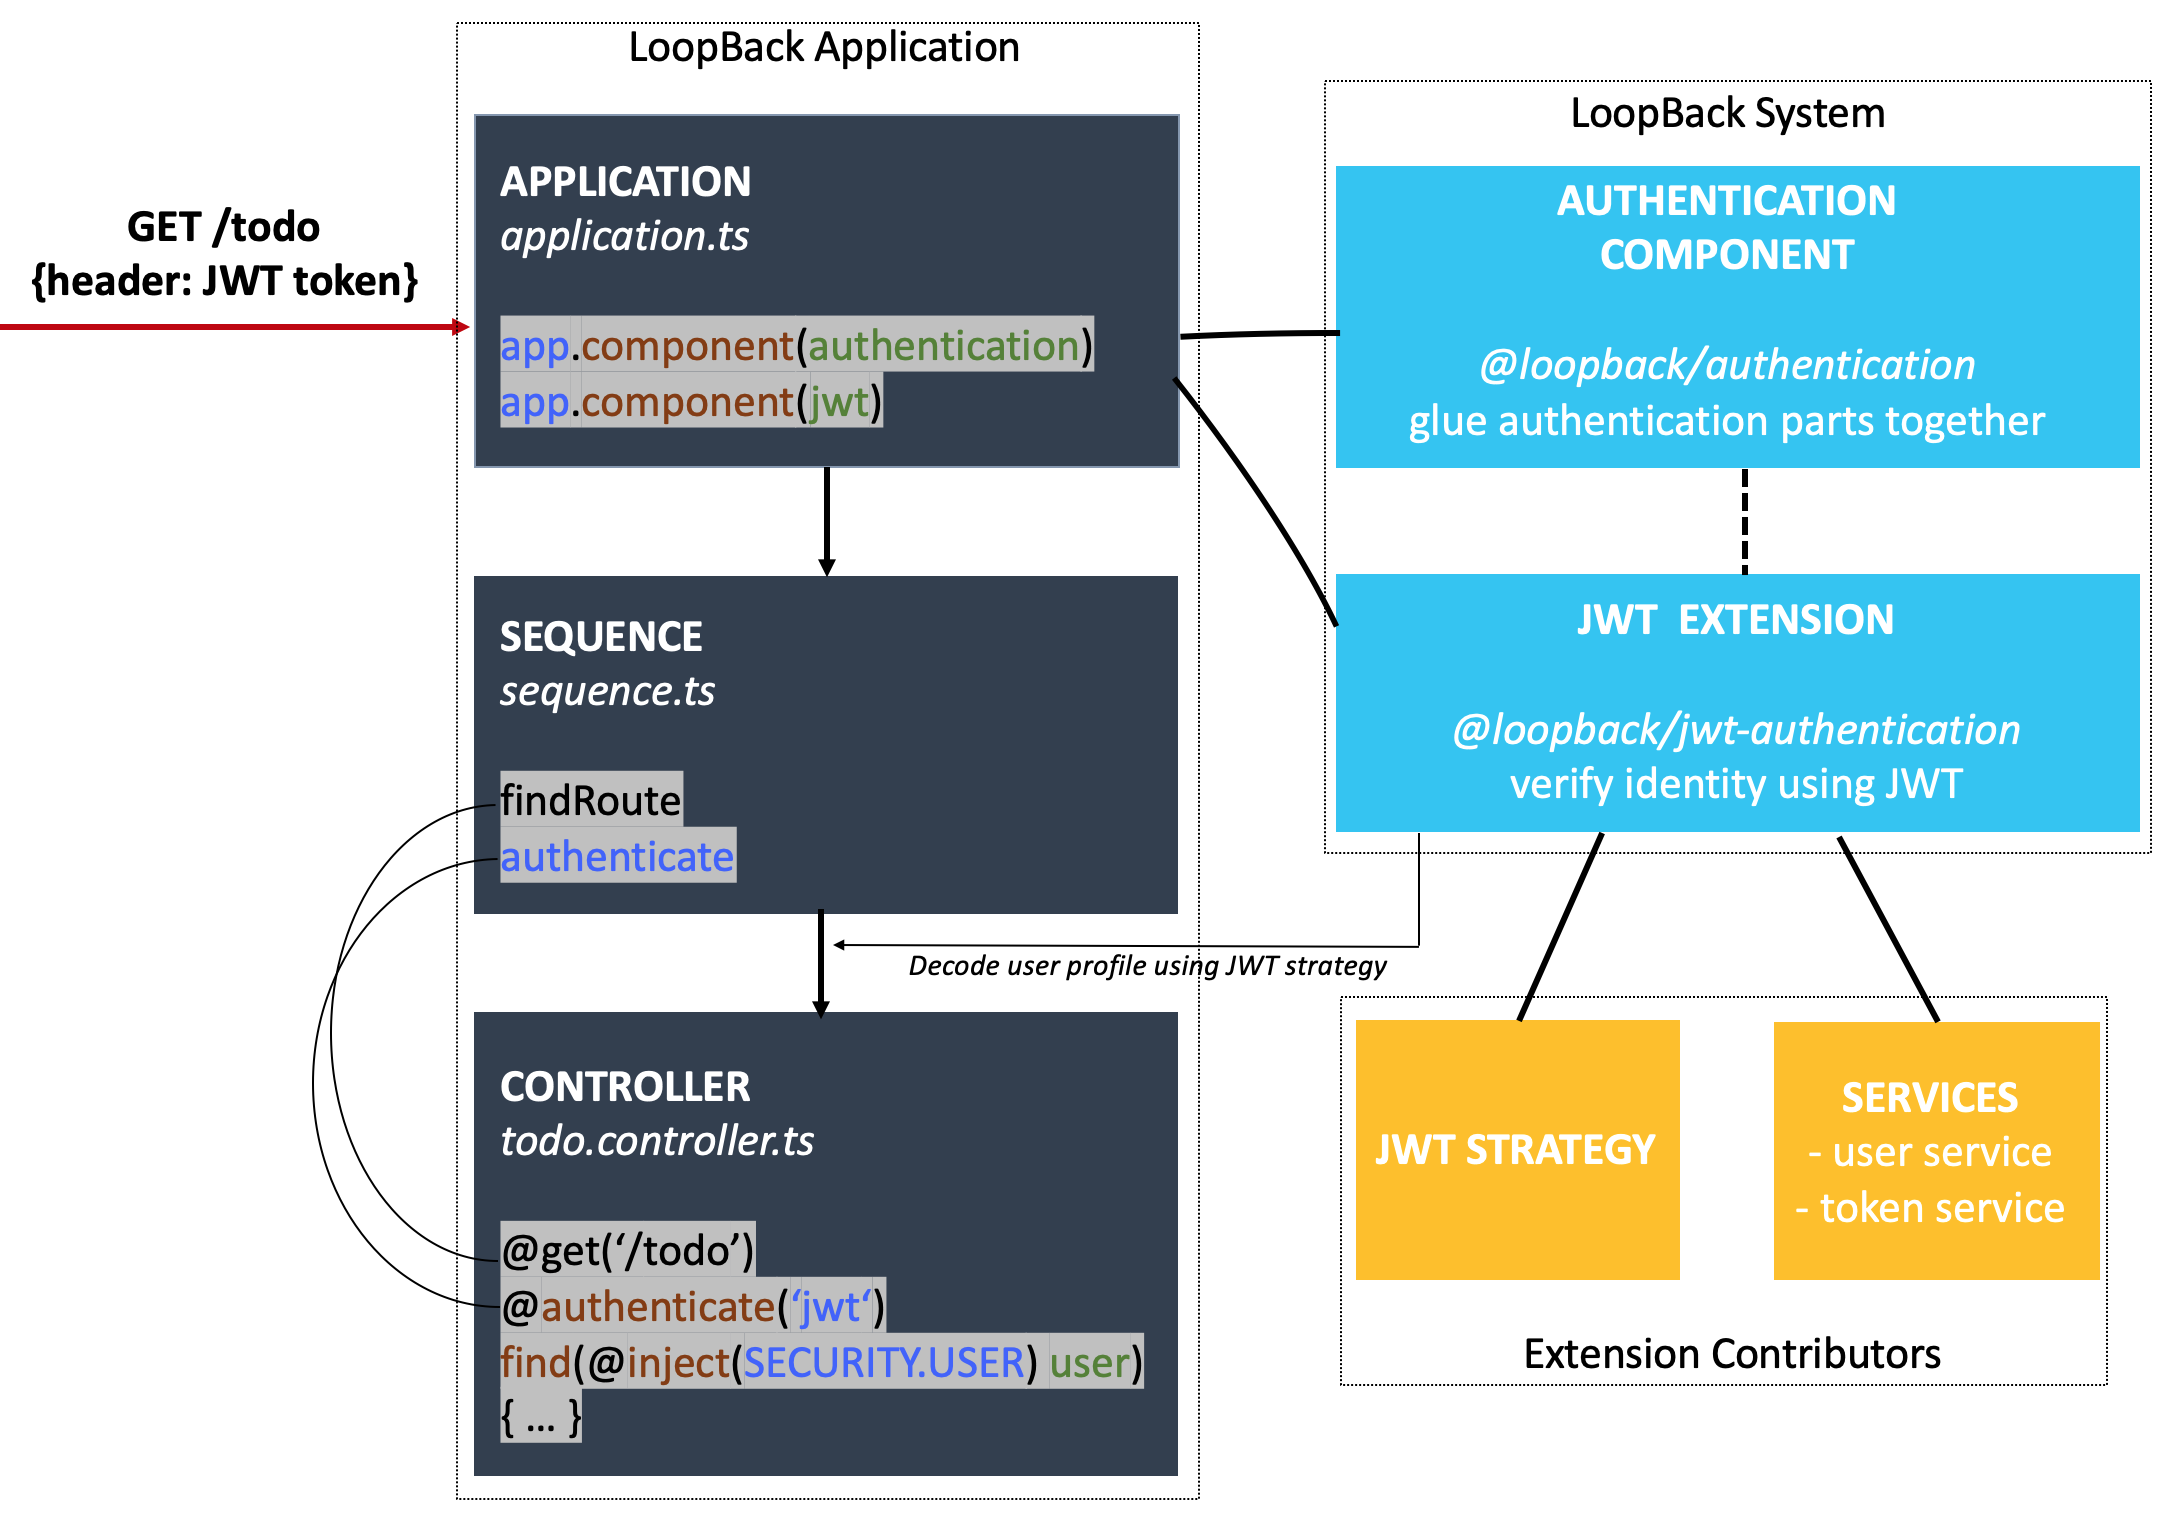
Let’s start with the following scenario: Suppose you want to limit access to todo items to the owner. The diagram below shows how such authentication process works with LoopBack’s authentication mechanism.

As illustrated above, during the request GET /todo, an access token in the
Authorization header is handled by the REST server’s sequence. The
authentication action is then invoked to decode the user profile from token so
that controllers can have the user injected.
To implement this, all you need to add is the code in the highlighted code snippet:
- Register the authentication component and JWT extension in your application.
- Enable the authenticate action in sequence.
- Decorate the controller endpoint with
@authenticate()and inject the user passed from the authentication layer.
Note:
For middleware-based sequence, there is no longer needed to add the authenticate action as the authentication is enforced by a middleware that’s automatically discovered and added to the sequence.
The rest will be handled by the authentication component
@loopback/authentication, which incorporates the authentication mechanism, and
the JWT extension @loopback/authentication-jwt, which helps in implementing
JWT-based authentication to the system and should be provided by extension
developers.
Tutorials
The authentication system is highly extensible and pluggable. It’s easy to get
started with. While there are more advanced features to explorer - of which are
beneficial when you build more complicated and larger scale applications, it
requires understanding the mechanics of the system, like how component
@loopback/authentication works. To help you learn the full features gradually,
we’ve broken down the documentations into several parts:
- JWT todo example: A tutorial to get started by applying the JWT authentication in the todo example. We highly recommend you to get started with this example.
- Understand the modules provided out-of-the-box:
- JWT extension: A prototype implementation of the JWT authentication.
- Authentication component: A deep
dive of component
@loopback/authentication.
- Create your own authentication strategy: Particularly for extension developers.
- Use Express Passport strategies: The usage
of passport adapter module
@loopback/authentication-passport.
Examples
Here is a list of authentication related examples created by LoopBack team or contributed by community members:
-
passport-login: An example implementing authentication in a LoopBack application using Passport modules.
-
todo-jwt: A modified Todo example with JWT authentication.
-
(community) build jwt authentication from scratch: An example to enable JWT authentication in a LoopBack application with detailed steps.