How to submit a pull request (PR) for LoopBack 4
This tutorial is about how to submit a pull request (PR) for LoopBack 4 while following our conventions and requirements.
Pick Expert Instructions or Beginner Instructions mode based on your experience with GitHub’s PR flow.
To contribute high-quality code/docs, please read Contributing to LoopBack, Contributing code, and Contributing to docs, before diving into the PR process.
Expert Instructions
In addition to your knowledge about GitHub and creating a pull request, we have specific conventions and requirements you need to follow when submitting a pull request for LoopBack 4.
1. Commits to local repository
You need to sign off each commit with DCO. See details to sign off.
Our commit messages are formatted according to Conventional Commits.
Please read the Commit Message Format guidelines to correctly format your commit messages.
To change an existing commit please refer to Changing a commit message.
Note: Run npm install inside loopback-next after git clone. This will automatically set up git commit-msg hooks to check the conventions and block invalid messages.
2. Before pushing to remote repository
Before pushing to the remote repository, ensure your files are free of formatting, syntax, and logical/execution errors by running:
npm run lint:fix && npm test
Note: npm run lint:fix might reformat the source code and fix style issues. Be sure to add such changes to your commit.
3. After creating PR, fill out checklist
The pull request has a checklist that must be filled out appropriately.
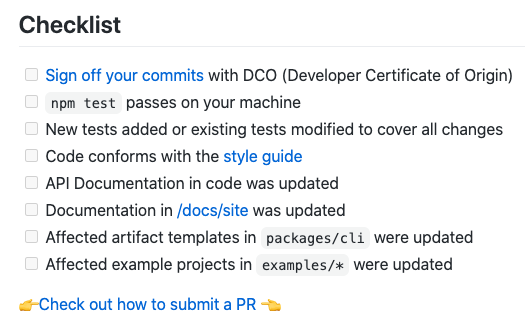
Of particular importance are the 'How to sign off your commits with DCO' link
and the 'npm test passes on your machine' checkbox.
4. Check CI status
Ensure that the continuous integration (CI) jobs associated with your pull request complete successfully.
It might take some time for CI jobs to be scheduled and completed.
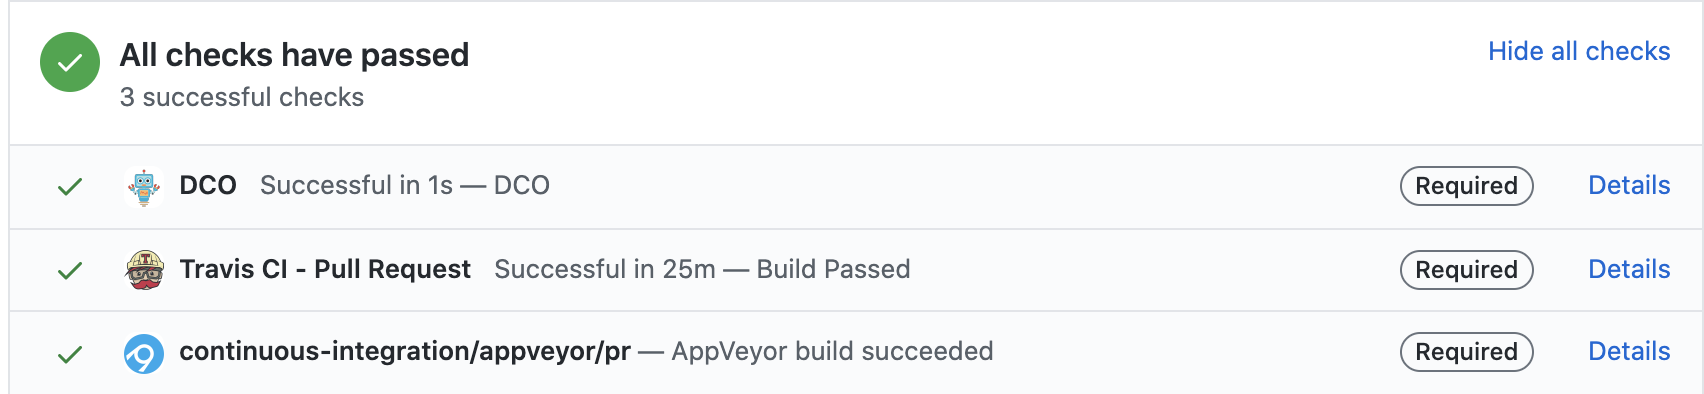
If a build fails, click on its Details link for more information.
For example, clicking on the Details link for the Travis CI build job takes
us to the Travis CI build page.
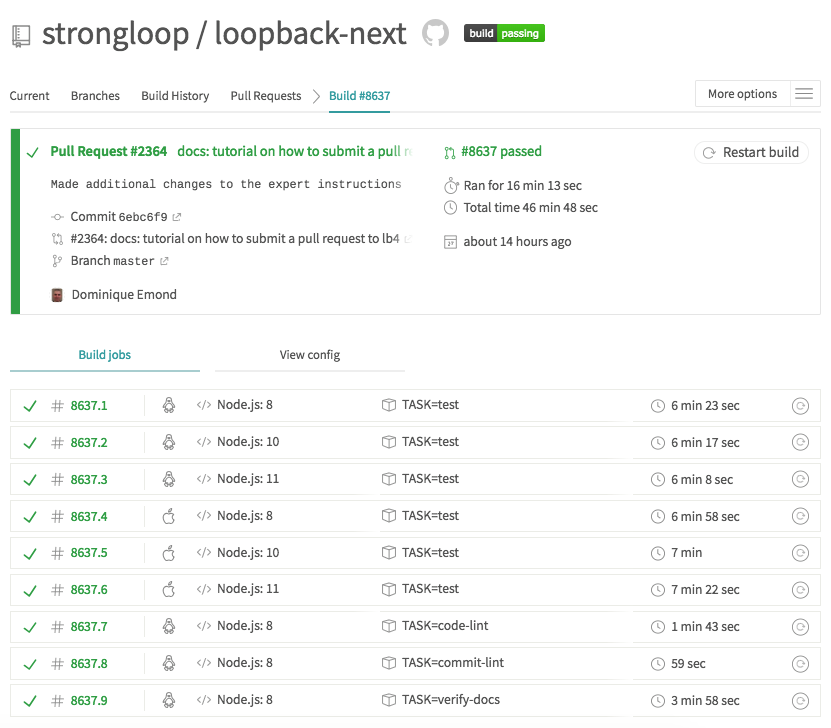
Here you can investigate the status of the job, its sub-jobs, or restart them.
5. PR Review Process
The review process is iterative, so it is normal that multiple commits may be
required until the pull request is finally accepted.
Tip: After a pull request is created, any additional commits that you push to your remote feature branch automatically get added to the pull request. There is no need to close the initial pull request and create a new one.
Reactively rebase your forked repository against the upstream master branch to keep them in sync; if needed.
6. Before your PR is merged by a maintainer
Before the PR is merged by a maintainer, your may be asked to clean up the
commits by
squashing commits
to ensure meaningful change logs. Use the git rebase -i command if necessary.
Beginner Instructions
Here is a complete tutorial on how to submit a pull request (PR) for LoopBack v4.
1. Fork the loopback-next repository
In your browser, navigate to https://github.com/loopbackio/loopback-next.
Create your own fork of the repository by pressing the Fork link on the
right-hand side.
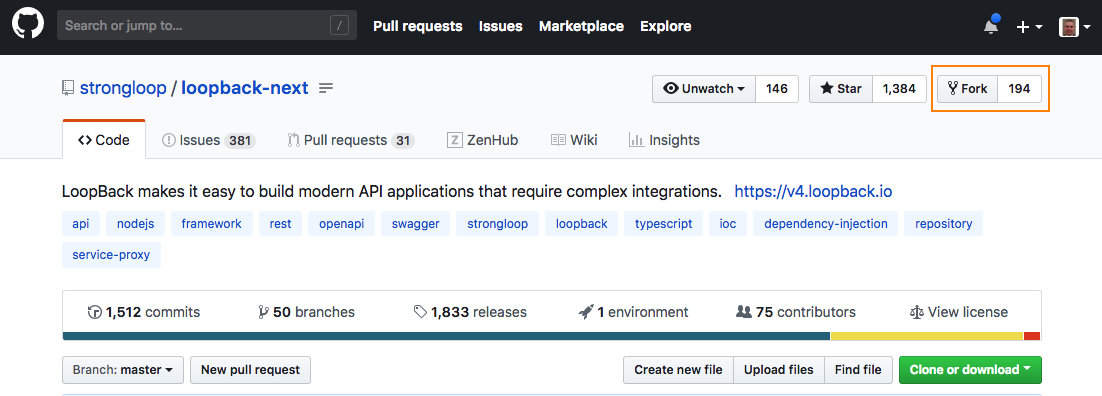
When the forking process is complete, the repository will show up as
{ your user id }/loopback-next. In my case, it is emonddr/loopback-next.
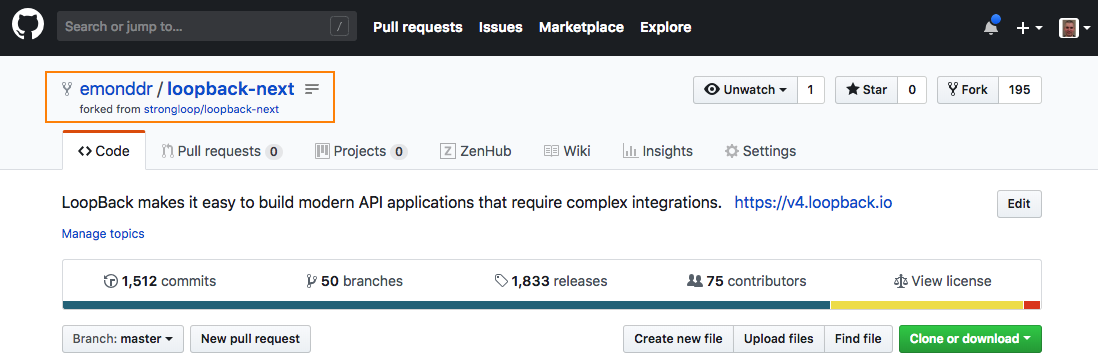
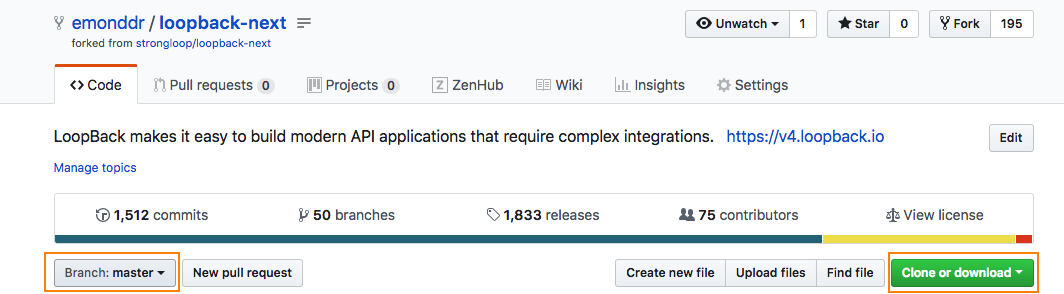
2. Create the feature branch
Notice your repo has a master branch already created (refer to bottom left
corner of the picture above). It is commonplace to have this branch represent
the latest, clean version of this repository’s content. For the purposes of your
PR, let’s create a feature branch with a name indicative of your changes. In
my case, it is emonddr-doc-changes.
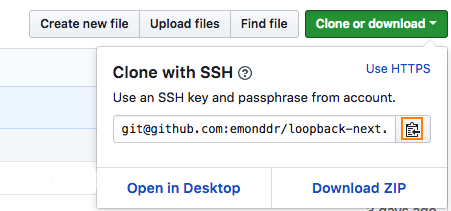
Click on the Clone or download button
This brings up tiny dialog with different choices: Clone with SSH, Use HTTPS, Open in Desktop, or Download Zip.
In my case, I will leave it as Clone with SSH, and click on the
copy to clipboard icon on the right side of the repository url (we are going
to paste this value in a terminal window soon).
Open a terminal window, and navigate to the directory where you want to clone
the repository. In my case, this is /Users/dremond/git.
To create the feature branch, run:
git clone { repository url from clipboard }
cd loopback-next
git checkout -b { your feature branch }
To install the package dependencies, run
npm install
3. Make changes locally
Whether you are contributing to code or documentation, make all your changes inside in the local feature branch directory.
To ensure your files are free of formatting, syntax, and logical/execution errors, run:
npm run lint:fix && npm test
Note: npm run lint:fix might reformat the source code and fix style issues. Be sure to add such changes to your commit.
4. Commit changes to the local feature branch
When you are pleased with the work you have done on the local copy of your
feature branch, you will want to stage your changes in preparation for a
commit.
To find out which files have been modified, added, deleted, and also what is staged or unstaged, run:
git status
To stage all untracked files, run:
git add --all
To stage one untracked file at a time, run:
git add { relative path to file from root directory }
When you are pleased with your staged changes, it is time to create a commit
and give it a message.
You need to sign off each commit with DCO. To sign off, you can use the -s
flag or adding Signed-off-By: Name<Email> in the commit message. See
details to sign off.
Our commit messages are formatted according to Conventional Commits.
Please read the Commit Message Format guidelines to correctly format your commit messages.
To help with abiding by the rules of commit messages, please use the
commitizen tool mentioned in the documentation above. This means will we use
git cz -s instead of git commit -s. Install commitizen by running
npm install -g commitizen.
In my case, I want the commit message to look like this:
docs: tutorial on how to submit a pull request to lb4

This tutorial shows contributors step-by-step instructions on how to submit a pull request (PR) to LoopBack v4
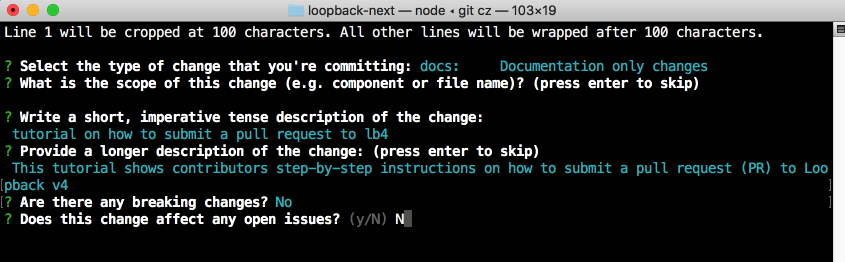
To start commitizen, run:
git cz -s
Follow the prompts for the various fields.
In my case I have entered:
type                : docs
scope               : <blank>
short description   : tutorial on how to submit a pull request to lb4
long description    : This tutorial shows contributors step-by-step instructions on how to submit a pull request (PR) to LoopBack v4
breaking changes    : N
affects open issues : N
The interactive commitizen prompts complete and the commit is created with a
properly formatted message.
Tip: If you signed the commit but still get an error saying message must be signed off, you can add --no-verify in the git commit command. If you have to sign off existing commits in a PR with the git rebase command, make sure to use HUSKY_SKIP_HOOKS=1 git rebase -i ... to skip commit hooks as the signed-off-by rule may block you.
5. Push commits to the remote feature branch
It is now time to push your local committed changes of your local feature branch directory to your remote feature branch; to keep them in sync.
The very first time you push your changes you should run:
git push --set-upstream origin emonddr-doc-changes
The --set-upstream parameter will set up the tracking between your local
feature branch and your remote feature branch.
Afterwards, for any additional push, you just need to run:
git push
It is not necessary to create a pull request immediately on the push of your first commit; this can be done later.
Do take some time to think about how many commits you want in the pull request when you eventually create it.
If it makes sense to place your changes into one commit, then do so.
If, however, it makes more sense to place your changes into a few logically separate commits, then do so.
Whatever is the best way for the maintainers to understand the changes when the pull request is being reviewed.
You can always re-organize commits or compress the number of commits later
through a step called Squashing Commits.
6. Rebasing
Eventually your fork of the original repository will become stale, and it will be necessary to bring it up-to-date.
It is recommended that you perform a rebase before actually creating a pull
request; if necessary.
In my case, the fork of the repository is behind by several commits.
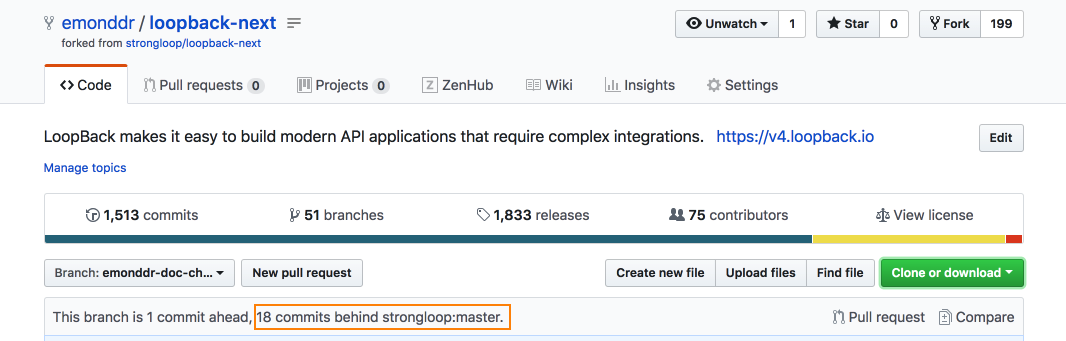
It is necessary to perform a rebase.
To rebase your forked repository’s master branch off of the original
repository, run:
git remote add upstream git@github.com:loopbackio/loopback-next.git
git checkout master
git pull --rebase upstream master
git push --force-with-lease origin master
To rebase your feature branch off of your master branch, run:
git checkout { your feature branch }
git rebase master
git push --force-with-lease origin { your feature branch }
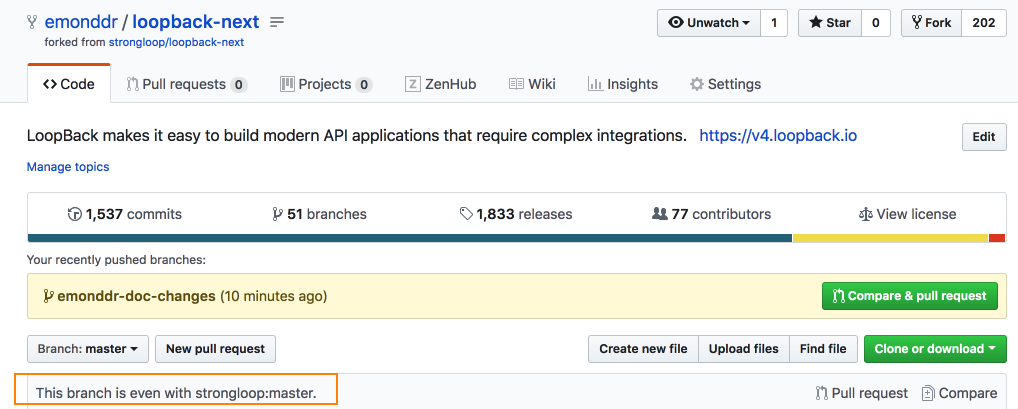
Now we can see that the copy of the repository is no longer behind in several commits.
The master branch the forked repository is even with original repository.
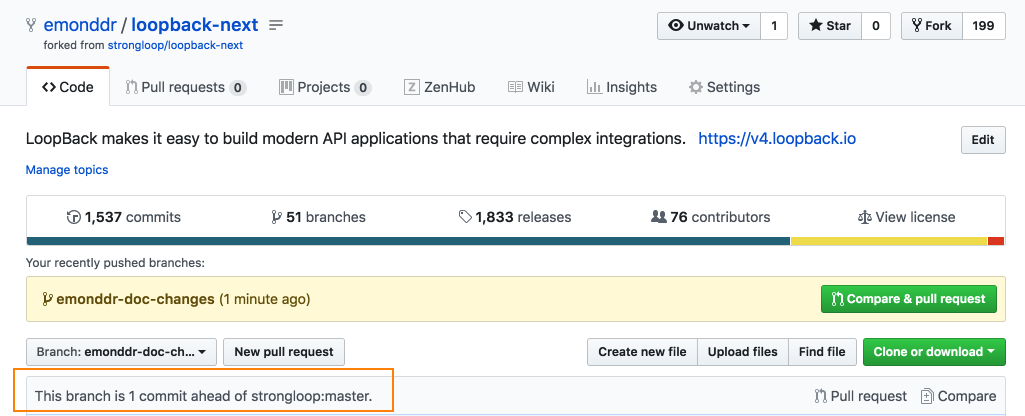
The feature branch of the forked repository is 1 commit ahead of the master
branch, and not behind on any number of commits.
7. Create the pull request (PR)
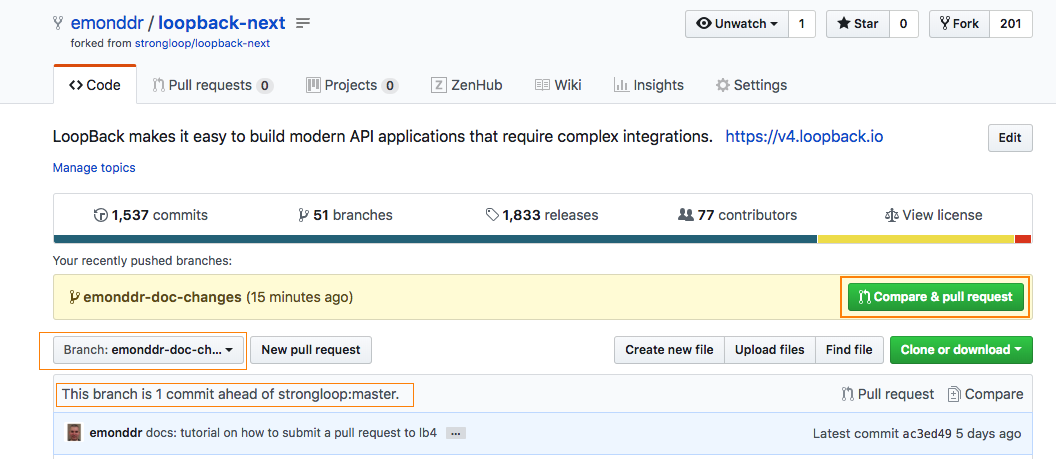
In your browser, navigate to your remote feature branch, and press the
Compare & pull request button.
The short and long description fields of the pull request are auto-filled using the short and long description of your commit.

Note: The title of the pull request should start with [WIP] for work in progress when the pull request is not complete yet.
A template is also provided in the long description field.
Use the template to fill in as much information as possible to properly describe the purpose of the pull request.
There is checklist that must be appropriately filled out.
Of particular importance are the 'How to sign off your commits with DCO' link
and the 'npm test passes on your machine' checkbox. They are a pre-condition
to your pull request being approved.
Press the Create pull request button.
The pull request is created.
Some continuous integration (CI) jobs commence; ensure they complete successfully.
8. PR review process
Once your PR is created, the appropriate reviewer(s) will be notified. This is
determined by the configuration settings in /loopback-next/CODEOWNERS.
The review process is iterative, so it is normal that multiple extra commits may be required until the pull request is finally accepted.
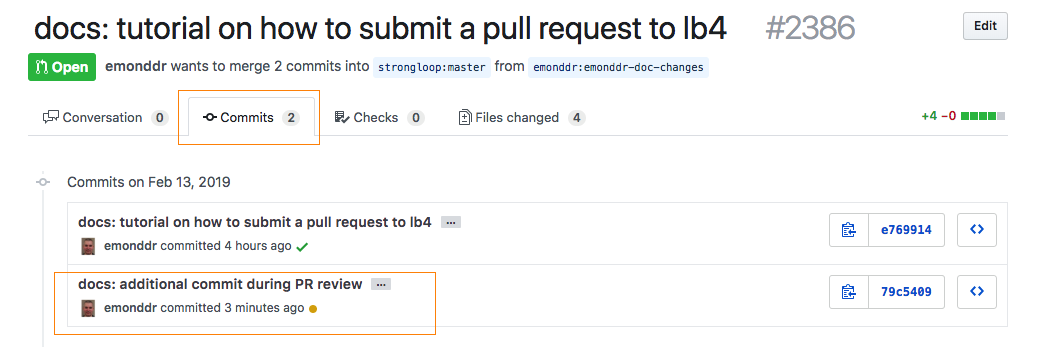
Tip: After a pull request is created, any additional commits that you push to your remote feature branch automatically get added to the pull request. There is no need to close the initial pull request and create a new one. Many beginners are not aware of this.
For example, I pushed a second commit to my remote feature branch after I created my pull request, and it automatically got added to the same pull request.
9. Final rebase and squashing of commits
Once the pull request is finally approved, repeat the Rebase section;if
necessary.
Then squash (or compress) many commits into a few distinct commits; whatever
the maintainers suggest. Squashing commits is a great way to keep the repository
commit history concise and clean.
In my case, I have 3 commits in my remote feature branch that I want to squash into one.

Ensure that you currently have your feature branch checked out, and that your local feature branch is in sync with your remote feature branch.
Run:
git status

I do have my feature branch checked out, and it is in sync with the remote feature branch.
Now let’s rebase the feature branch off of the master branch in an interactive
mode that allows us to squash the commits.
Run:
git rebase -i master
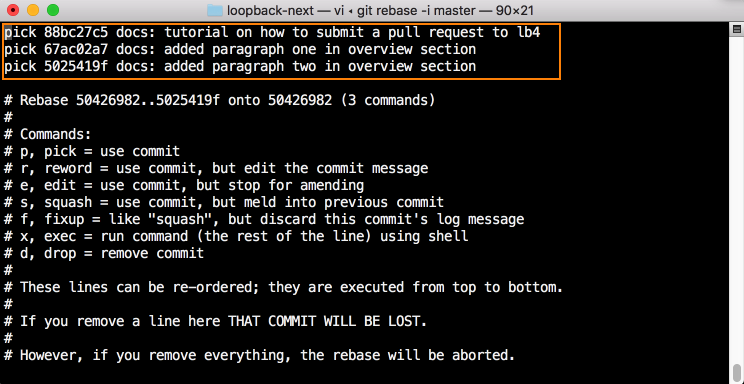
The vim editor opens and lists my 3 commits, and some commands that are
available.
Type i to place the editor into INSERT mode. Use the arrow keys to move
around, and the delete or backspace key for deleting characters.
I want to keep the commit message from the first commit, so I will leave the
word pick in front of the first commit, and change the words from pick to
squash for the second and third commits.
To save these changes, press the escape key, and type :wq

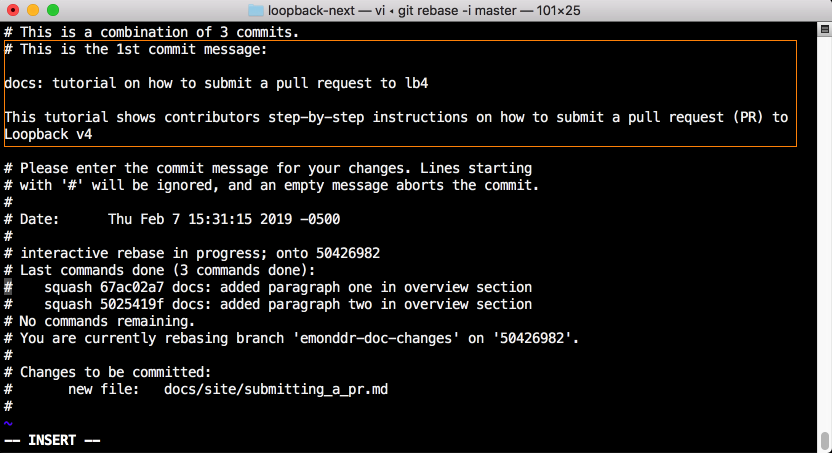
The vim editor comes up again to give me a chance to change my commit message.
You’ll notice that because I previously chose squash for the second and third
commits, it appended the commit messages of the second and third commits onto
the commit message of the first.

This can give a user a chance to view all messages before formulating one final message.
If I had a large number of commits and didn’t want all commit messages to be
appended together, I would have specified: pick, fixup, fixup instead of
pick, squash, squash. The command fixup is like squash, except that it
discards a commit’s log message.
In my case, I only like the message of the first commit, so I will delete the others.
Save the changes, and the interactive rebase command finally completes.
Push the changes from the local feature branch to the remote feature branch.
Run:
git push --force-with-lease
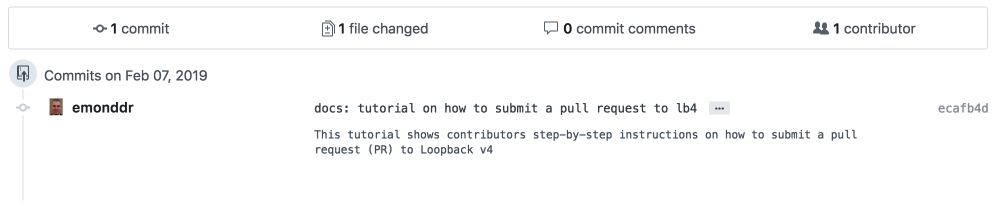
The remote feature branch and the pull request now have one commit.
If you find that you have commits in your PR that don’t belong to you, run the following on your branch:
git fetch origin
git rebase origin/master
Then push your branch again.
10. Ensure CI jobs complete successfully
The post-condition to your pull request being approved, is that all the
continuous integration (CI) jobs complete successfully.
It might take some time for CI jobs to be scheduled and completed.
Ensure that these CI jobs do complete successfully.
If a build fails, click on its Details link for more information.
For example, clicking on the Details link for the Travis CI build job takes
us to the Travis CI build page.
Here you can investigate the status of the job, its sub-jobs, or restart them.
11. Maintainer merges the pull request
When a project maintainer is satisfied with the pull request, he/she will
merge it into the master branch of the loopbackio/loopback-next
repo.