To get familiar with the authorization module and each element’s responsibility, this page will use the implementation of a RBAC(role-based-access-control) system as example.
User scenario
This is a RBAC system for users to manage their projects and teams. A user can create a project and an associated team, then it becomes the project owner and other users in the team become team members. When a user wants to perform an action to the protected resource, its role and a collection of access control rules makes decision: allowed or denied.
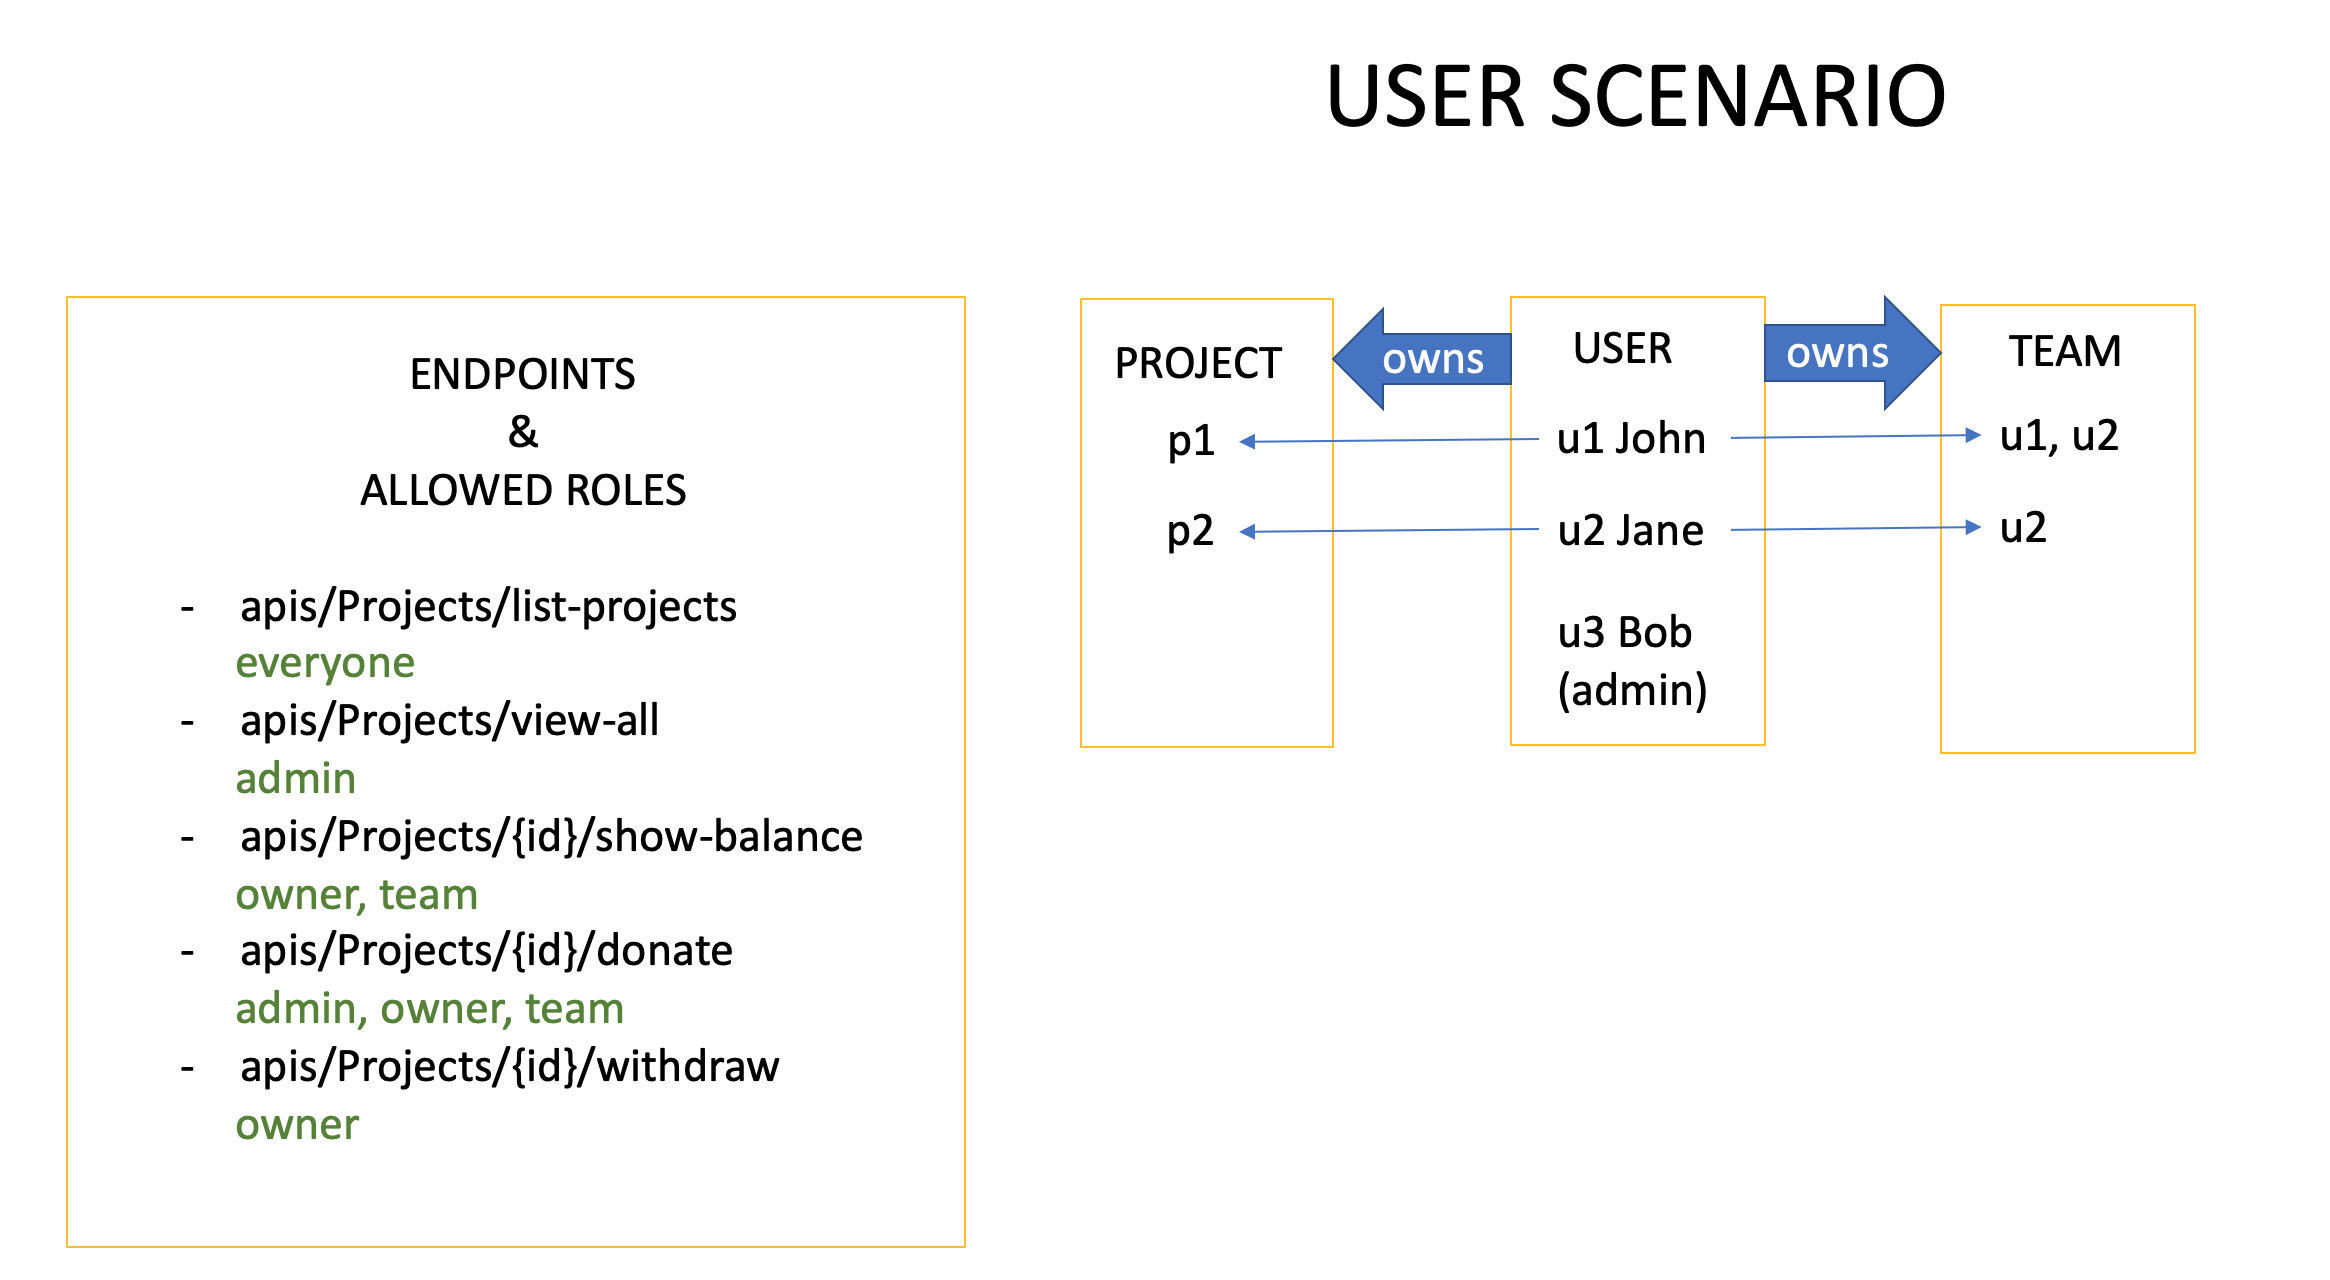
As you can tell from the table, there are different level’s permission rules:
- class level permission: admin can view all projects.
- instance level permission: a project’s owner/team member can check its balance.
Architecture
To build such a system, this is a list of what are needed and how to do it:
| WHAT ARE NEEDED | HOW TO DO |
|---|---|
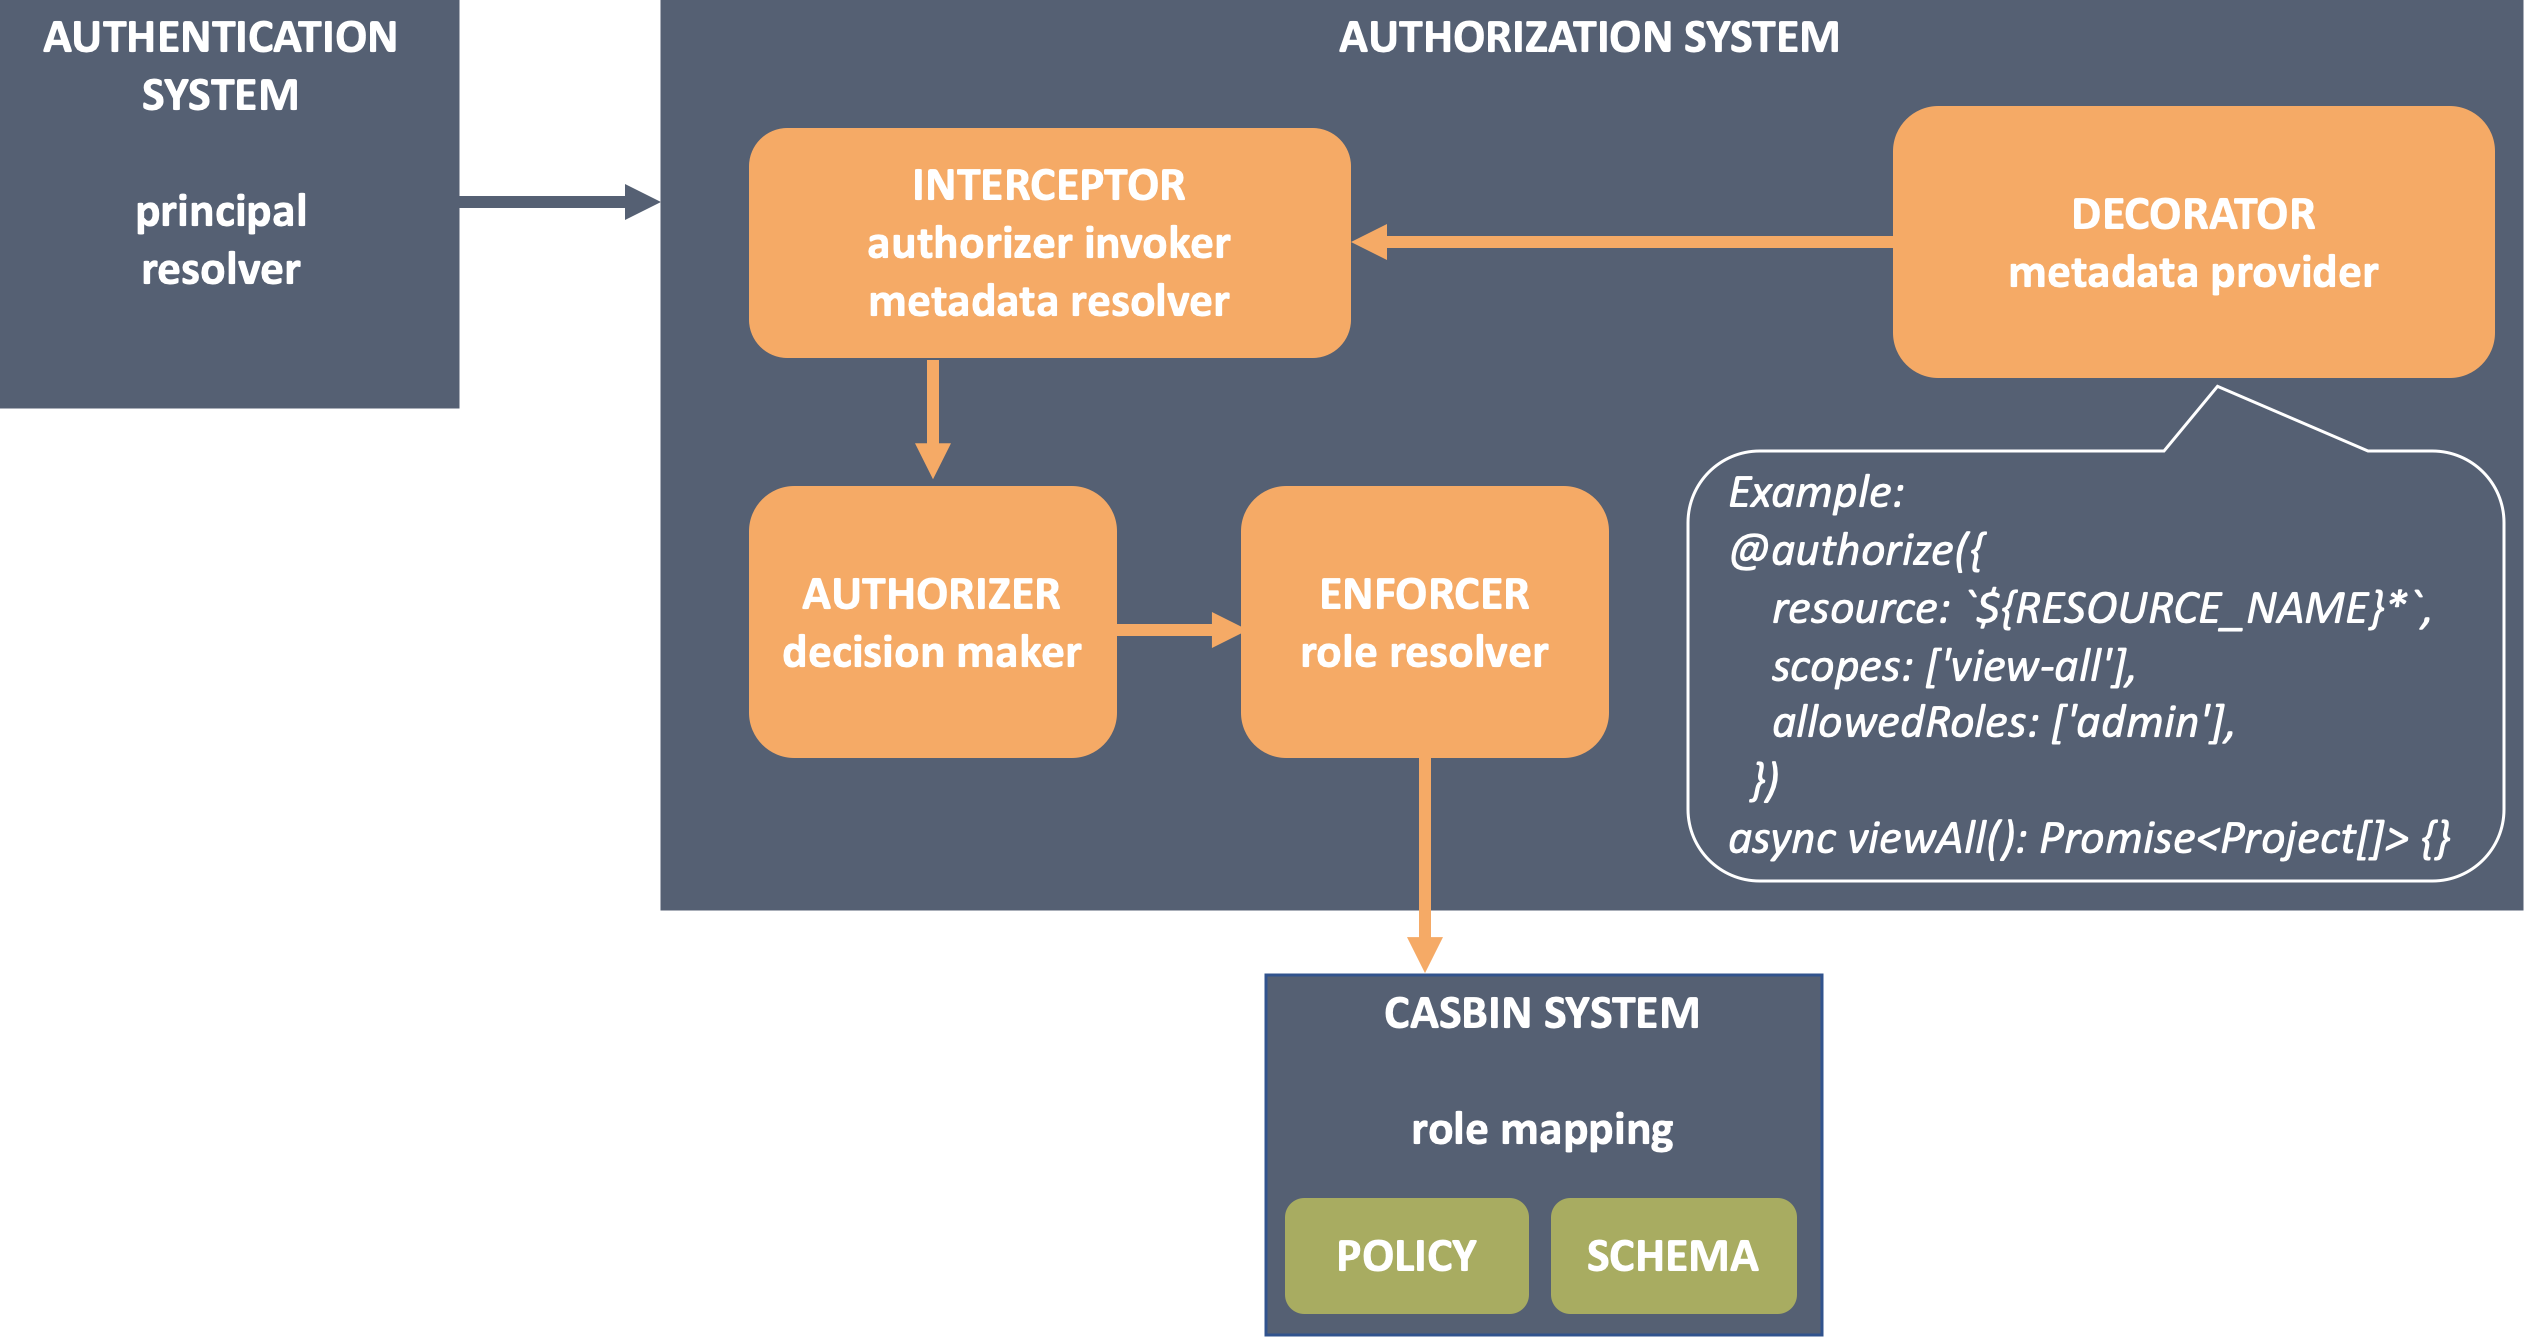
| A way to annotate endpoints with permission rules. | Decorate your endpoints with permission metadata using @authorize(). |
| A decision maker that processes the metadata and calls the role resolver. | Create authorizers to make decision. They process context like the metadata and the principal resolved from request, then invoke enforcer which talks to 3rd party libraries to calculate the result. |
| A role resolver to determine whether the principal have access to the resource. | Create enforcers calling 3rd party (casbin in this case) APIs to calculate the decision. |
| A 3rd party system manages the role mapping. | Leverage a casbin system to define and understand the role mapping. It consists of: 1. A model file describes the shape of request, policy, role mapping, and the decision rules. 2. Policy files contains all the policy rules. |
| A module to put all parts above together. | Mount component @loopback/authorization. |
The architecture diagram is:
Tutorial
The example is created in repository access-control-migration, and a tutorial of building it from scratch can be found in access control example migration.