@loopback/example-todo-list
This is an extended tutorial that builds on top of @loopback/example-todo.
Overview
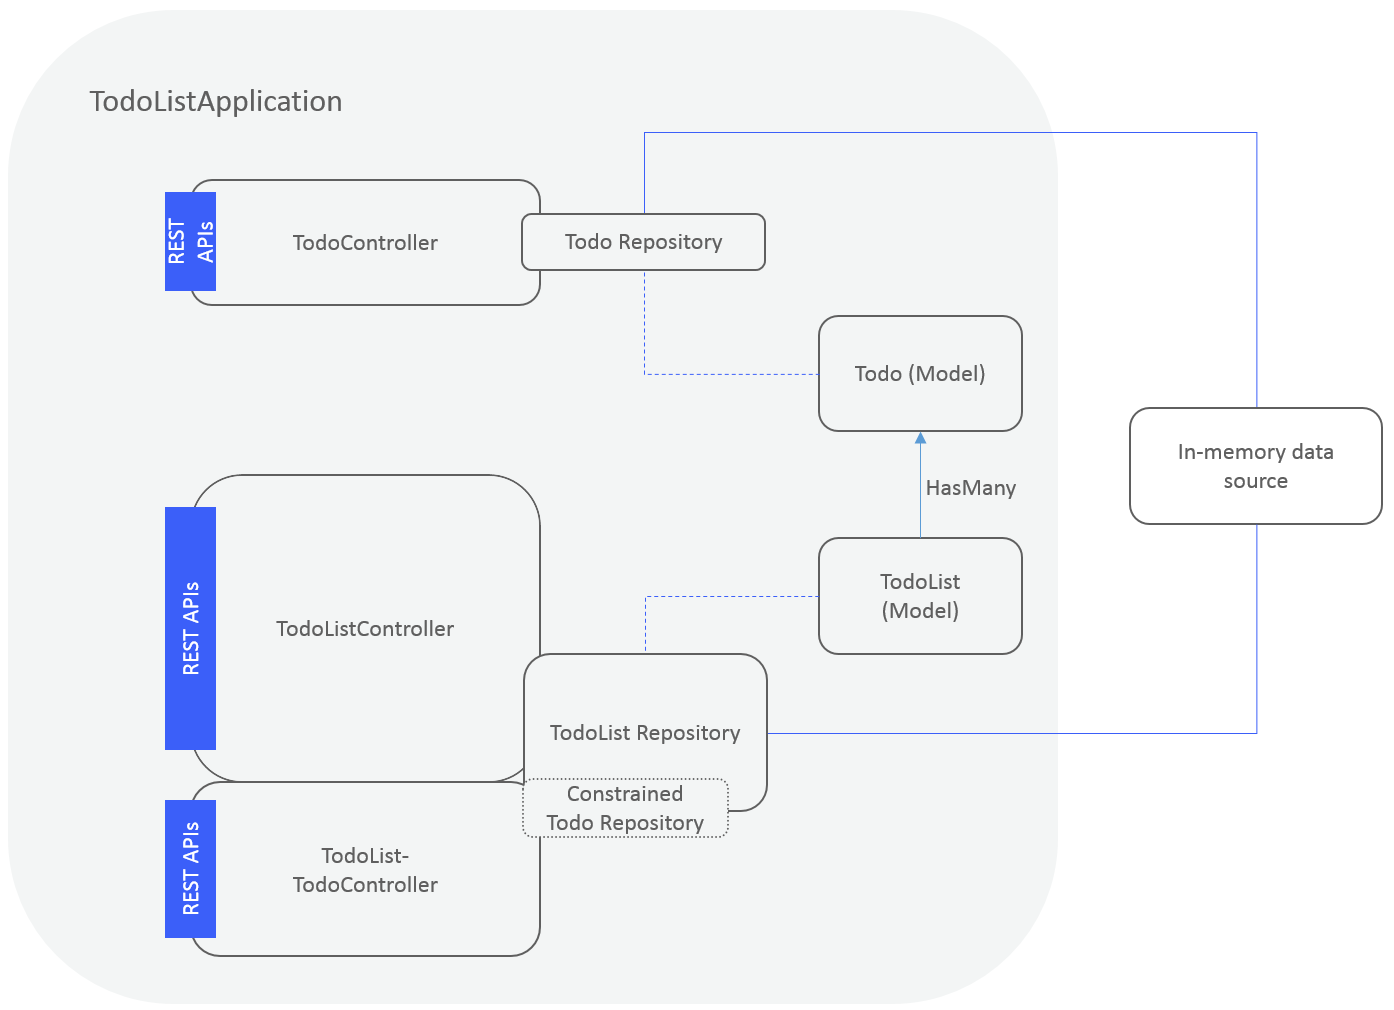
This tutorial demonstrates how to create a set of APIs for models that are related to one another.
Setup
If you’re following from the tutorial in @loopback/example-todo, you can jump
straight to our first step:
Add TodoList model
If not, you’ll need to make sure you have a couple of things installed before we get started:
- Node.js at v10 or greater
Next, you’ll need to install the LoopBack 4 CLI toolkit:
npm i -g @loopback/cli
We recommend that you start with the todo tutorial if you’re not familiar with LoopBack4, but if you are and don’t want to start from scratch again, you can use the LoopBack 4 CLI tool to catch up to where this tutorial will continue from:
lb4 example todo
It should be noted that this tutorial does not assume the optional geo-coding step has been completed. Whether the step has been completed or not, the content and the steps listed in this tutorial remain the same.
Tutorial
Once you’re ready to start the tutorial, let’s begin by adding a TodoList model
Steps
Try it out
If you’d like to see the final results of this tutorial as an example application, follow these steps:
-
Run the
lb4 examplecommand to select and clone the todo repository:lb4 example todo-list -
Switch to the directory.
cd loopback4-example-todo-list -
Finally, start the application!
$ npm start

Server is running at http://127.0.0.1:3000
Feel free to look around in the application’s code to get a feel for how it works. If you’re interested in how it’s been built or why we do things a certain way, then continue on with this tutorial!
Bugs/Feedback
Open an issue in loopback-next and we’ll take a look!
Contributions
Tests
Run npm test from the root folder.
Contributors
See all contributors.
License
MIT